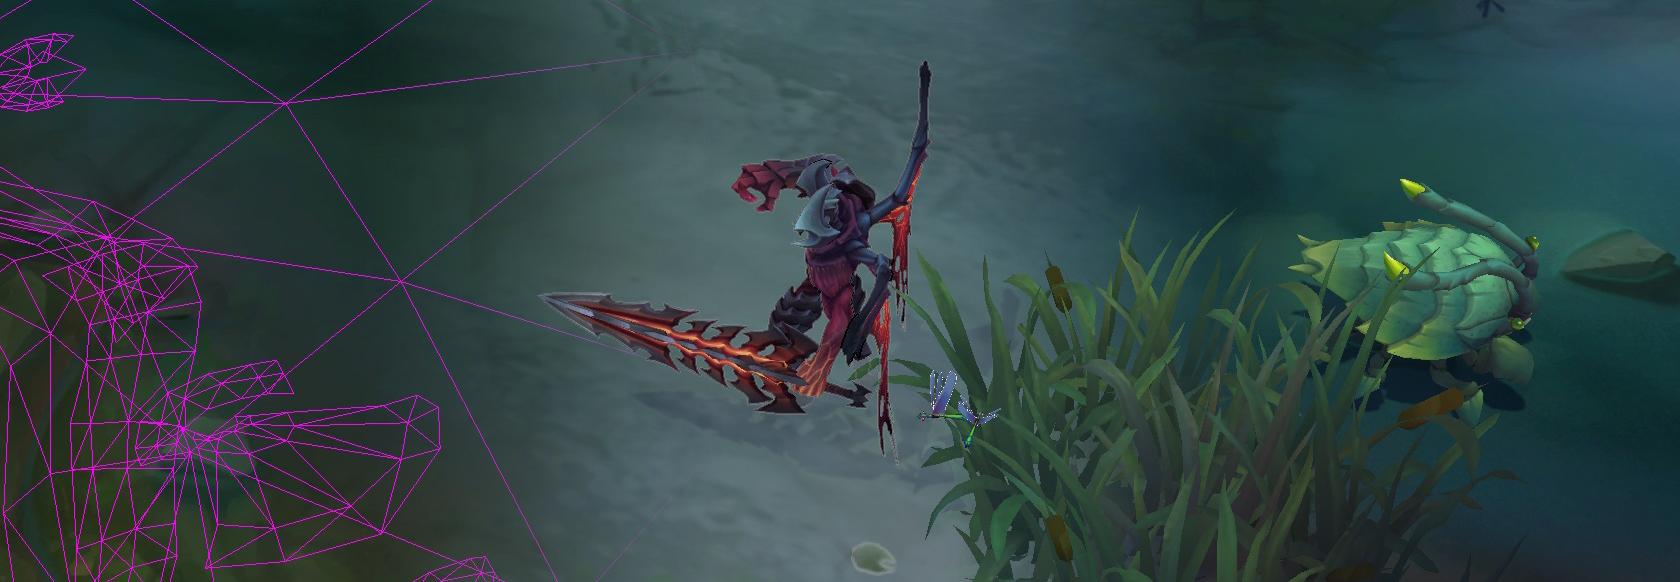
A Trip Down The LoL Graphics Pipeline
Hi, I’m Tony Albrecht and I’m one of the engineers on the new Render Strike Team under the Sustainability Initiative in League of Legends. The team has been tasked with making improvements to the League rendering engine, and we’re excited to get our hands dirty. In this article, I’ll provide a run-down on how the engine currently works - hopefully this will be the foundation on top of which I can later discuss the changes we make. It’s also a great excuse for me to step through the rendering pipeline myself so that we, as a team, totally grok what’s happening in there.
I’ll be presenting exactly how League builds and displays a single frame of the game (remember, on high end machines this is happening over 100 times per second). The discussion here will certainly be technical, but I’m hoping it’s digestible even if you don’t have experience with rendering. I’ll skip some of the complexity for the sake of clarity, but if anyone would like more details I certainly hope you ask.
First, a bit of brief context on the graphics libraries available to us. League has to work as efficiently as possible on a wide range of platforms. In fact, Windows XP is currently the fourth most popular OS version running the game (behind Windows 7, 10 and 8). There are over ten million games per month played on Windows XP, so to maintain backwards compatibility we have to support DirectX 9 and can only use the features it provides. We use a comparable featureset from OpenGL 1.5 on OS X machines as well (that should be changing soon).
So let’s dive in! To start, let’s look at how computers actually draw things (yes, we’re going there).
Rendering for Beginners
Most computers have a CPU (Central Processing Unit) and GPU (Graphics Processing Unit). The CPU is responsible for the game’s logic and calculations, while the GPU receives triangles and texture data from the CPU and displays them on screen as pixels. Small GPU programs called pixel shaders enable us to affect how this rendering occurs; for instance, we can change how textures are applied to triangles or instruct the GPU to perform a calculation for each texel in a texture. In this way we can simply apply a texture to a triangle, add or multiply multiple textures on a triangle, or do more complex processes like bump mapping, lighting, reflections, or even highly realistic skin shaders. All of the visible objects are drawn to an off screen frame buffer which is only displayed once all rendering has finished.
Let’s take a look at an example. Here is an image of Garen, showing all of the 6,336 triangles that make him up in wireframe and as a solid, untextured model. This model is crafted by our artists and exported in a format that the League engine can load and animate. (Note that Garen isn’t flat shaded; this is a limitation of the application being used to inspect the rendering).
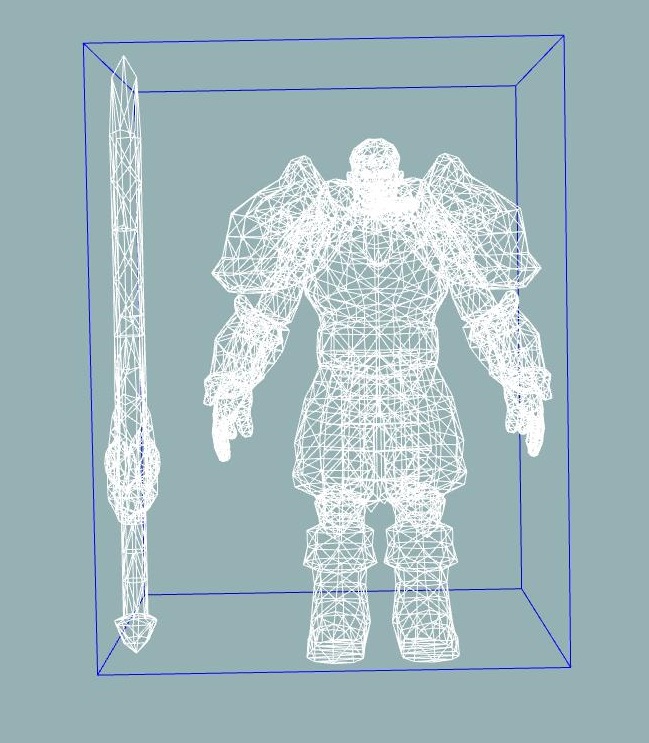
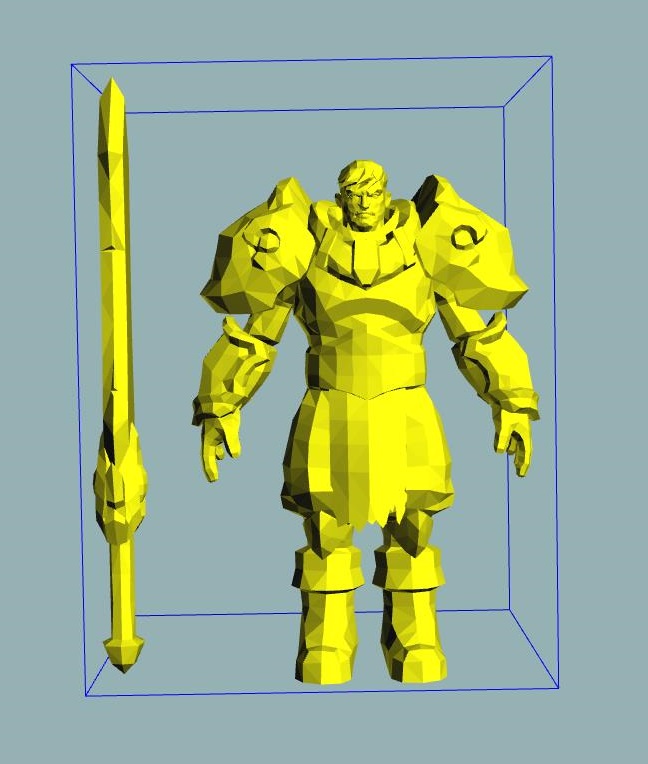
Besides being boring, this untextured model isn’t great for clarity and doesn’t really convey the Garen we all recognize. To bring Garen to life, we need to apply a texture.
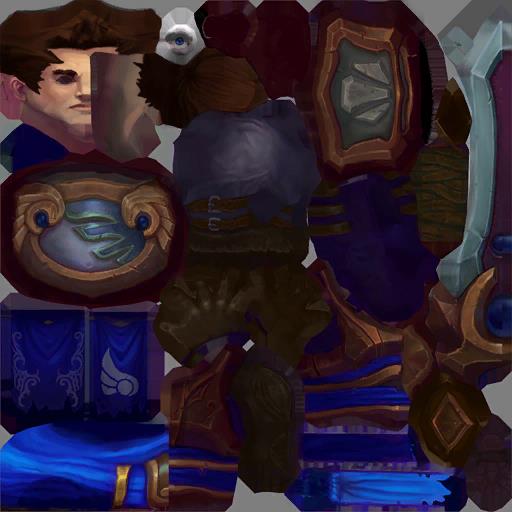
Before loading, Garen’s textures live on disk as DDS or TGA files, which look like the horror scene above on their own. Once they’ve been mapped correctly to the model, we end up with this:

Now we’re getting somewhere. The shader that renders our skinned meshes does more than just apply a texture, but we’ll go into that later in this article.
Those are the basics, but League has a lot more to render than just a champion model and texture. Let’s take a look at the steps that go into rendering the full scene below:
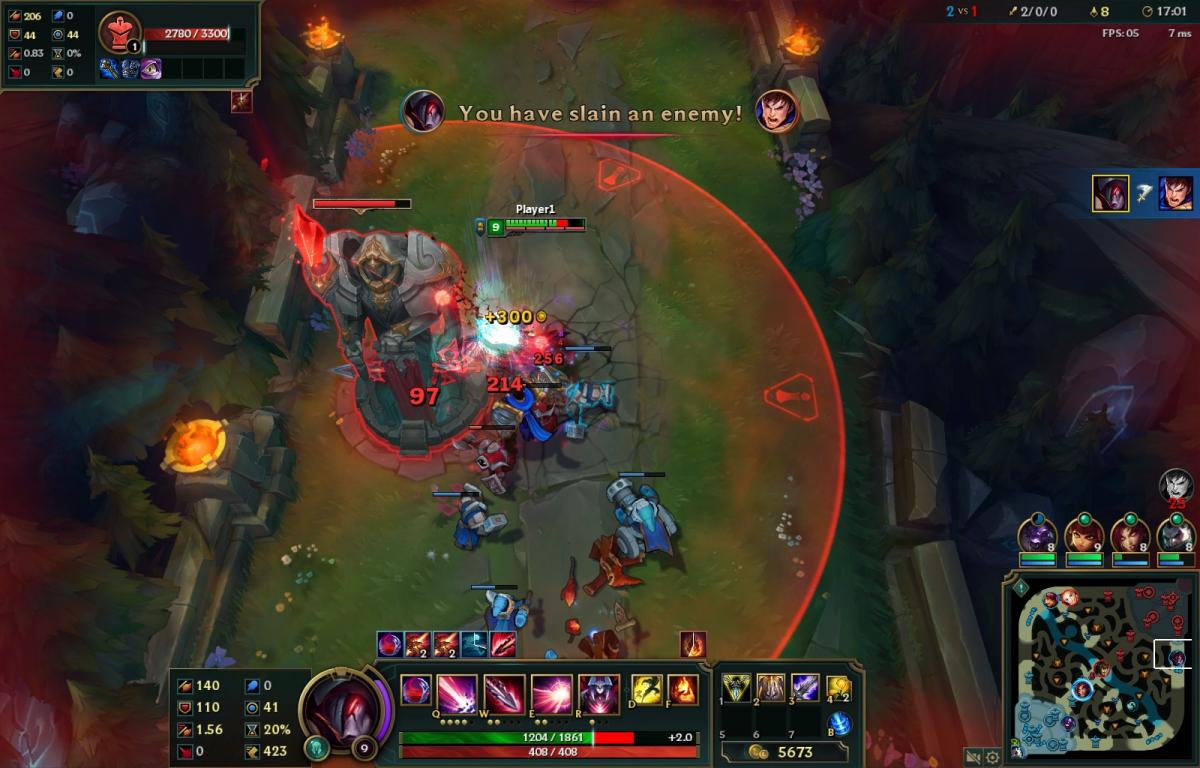
Render Stage 0: Fog Of War
Before we start drawing any of the scene, we first prepare for the fog of war and shadows (oooh fog and shadows, so ominous). The fog of war is maintained by the CPU as a 128x128 grid which is then upscaled to a 512x512 square texture (more on this in "A Story of Fog and War"). We then blur that texture and apply it to darken appropriate areas of the game and minimap.
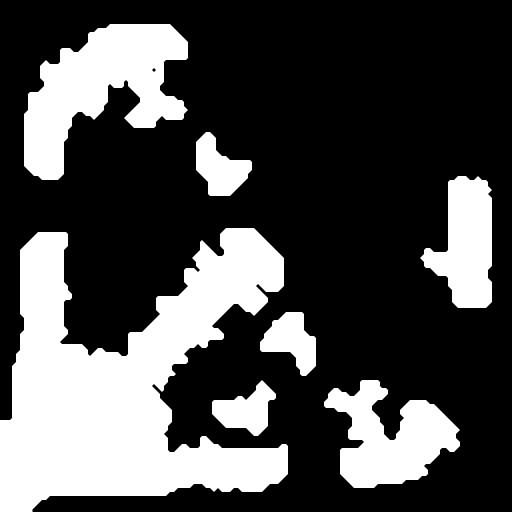
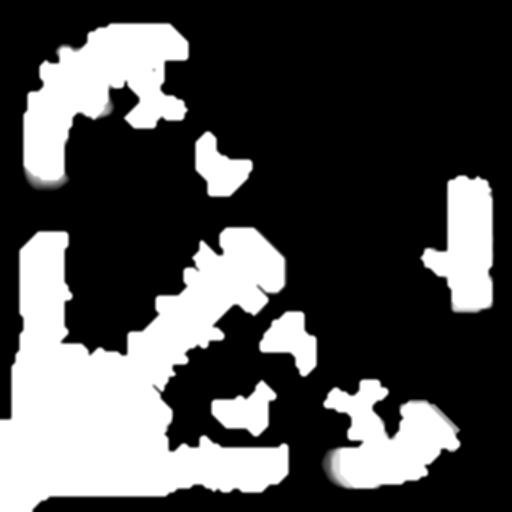
Render Stage 1: Shadows
Shadows are an essential part of a 3D scene. Without them, objects would appear to float about. To create shadows that look like they’ve been cast by a minion or champion, we need to render them from the point of view of a light source. The distance from the light to the shadow caster is stored for each pixel in RGB components, and we zero out the alpha component. This can be seen below. On the left we have the RGB shadow height field of a besieged tower, minions, and two champions. On the right we have the alpha component only. These textures have been cropped to more clearly show the detail of the shadows - minions toward the bottom, tower and champions toward the top.
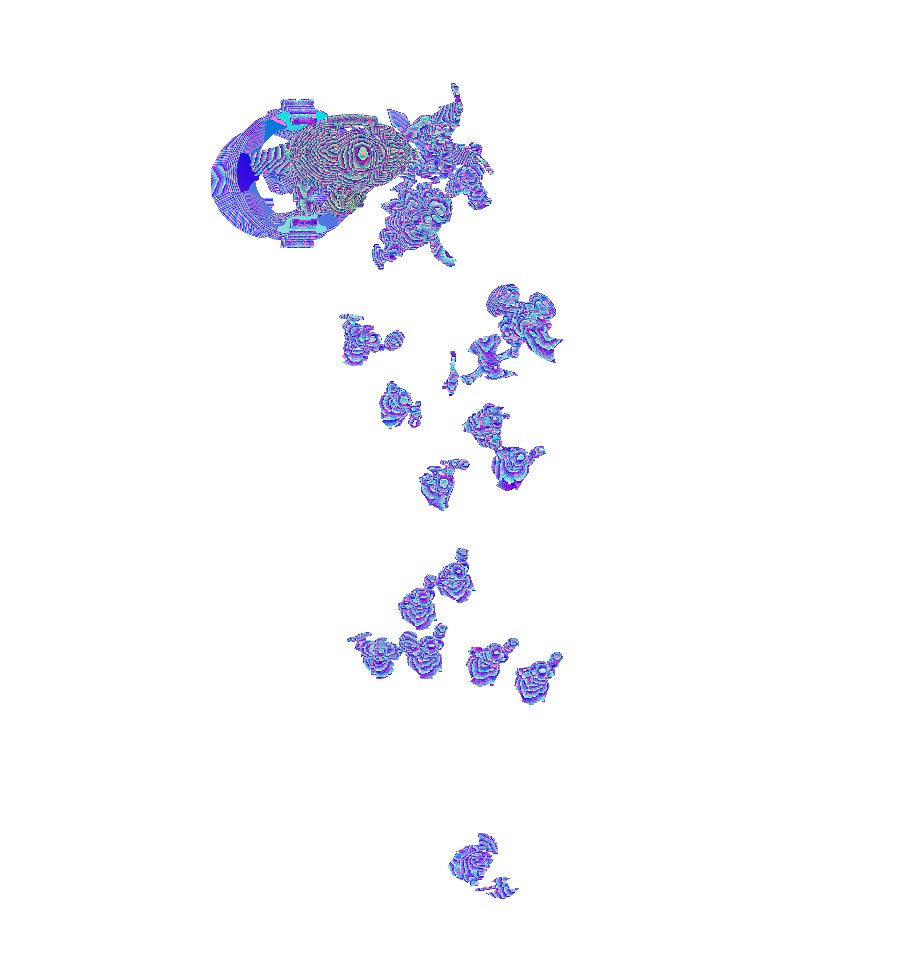
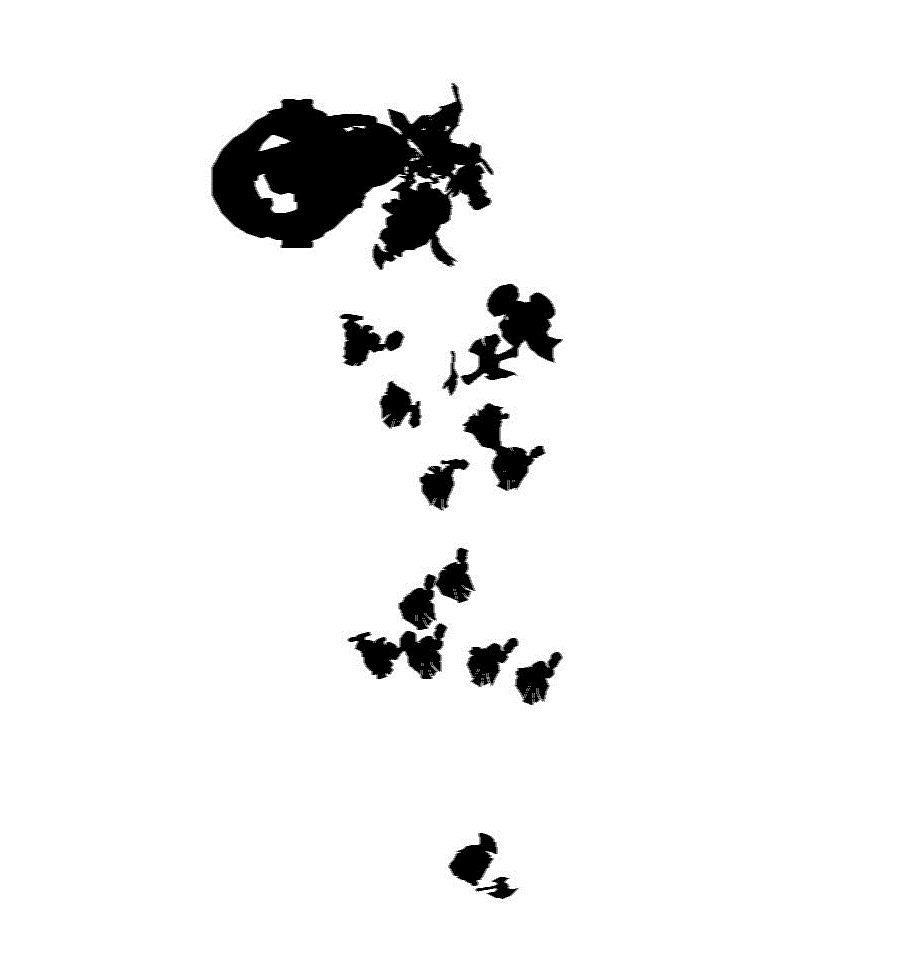
Lastly, we blur the shadows to give them a nice soft edge (along with a recent optimization to provide a nice bump in framerate). This results in a texture that we can layer onto the static geometry to give the impression of shadows.
Render Stage 2: Static Geometry
With the prepared fog of war and shadow textures in hand, we can begin drawing the rest of the scene in our frame. First up: static geometry (so called because it doesn’t animate). This geometry combines the fog of war and shadow information with its own primary texture to give us the scene below:
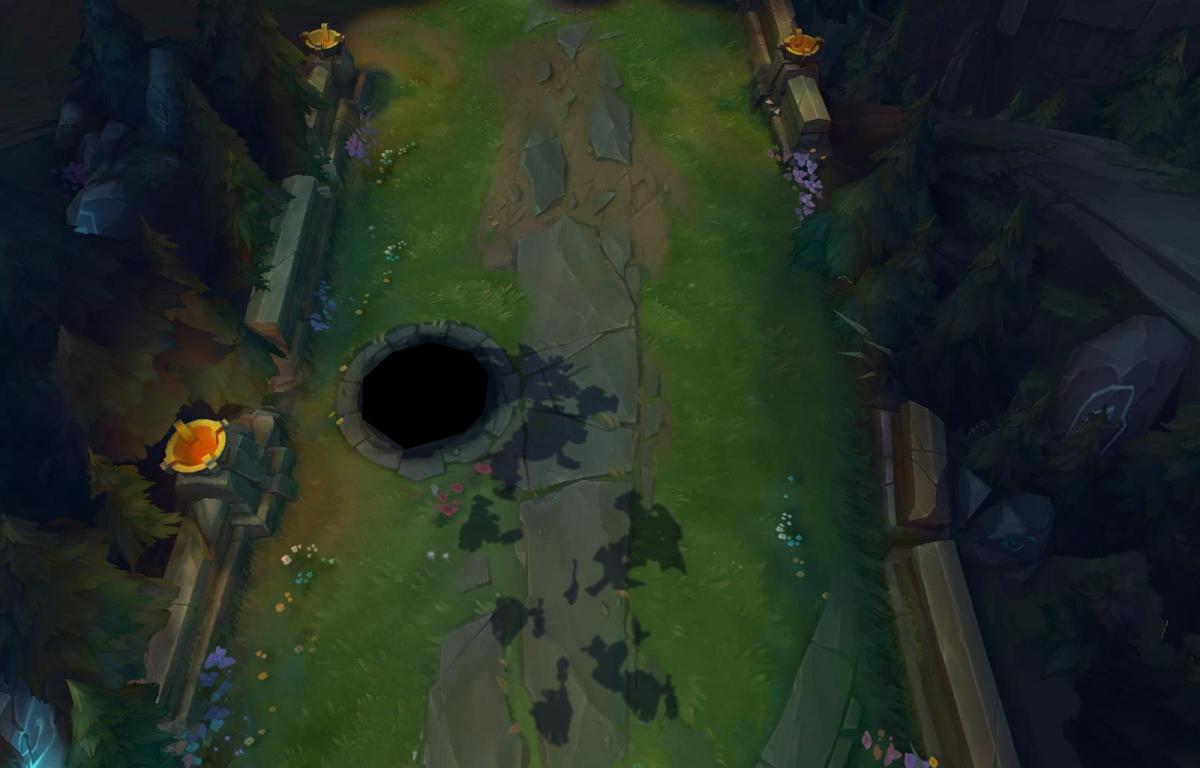
Note the shadows of the minions as well as the fog of war creeping in at the edges of the scene. The Summoner's Rift renderer doesn't render dynamic shadows for static geometry. Since the main light source does not move, we prebake the shadows of the static meshes into their textures. This gives the artists more control over the look of the map and also helps with performance (no need to render shadows from static meshes). The only shadow casters are minions, towers, and champions.
Render Stage 3: Skinned Meshes
Now that we have the terrain and shadows, we can start to put things on them. First up are the minions, champions, and towers - all objects that need to move realistically with bending joints.
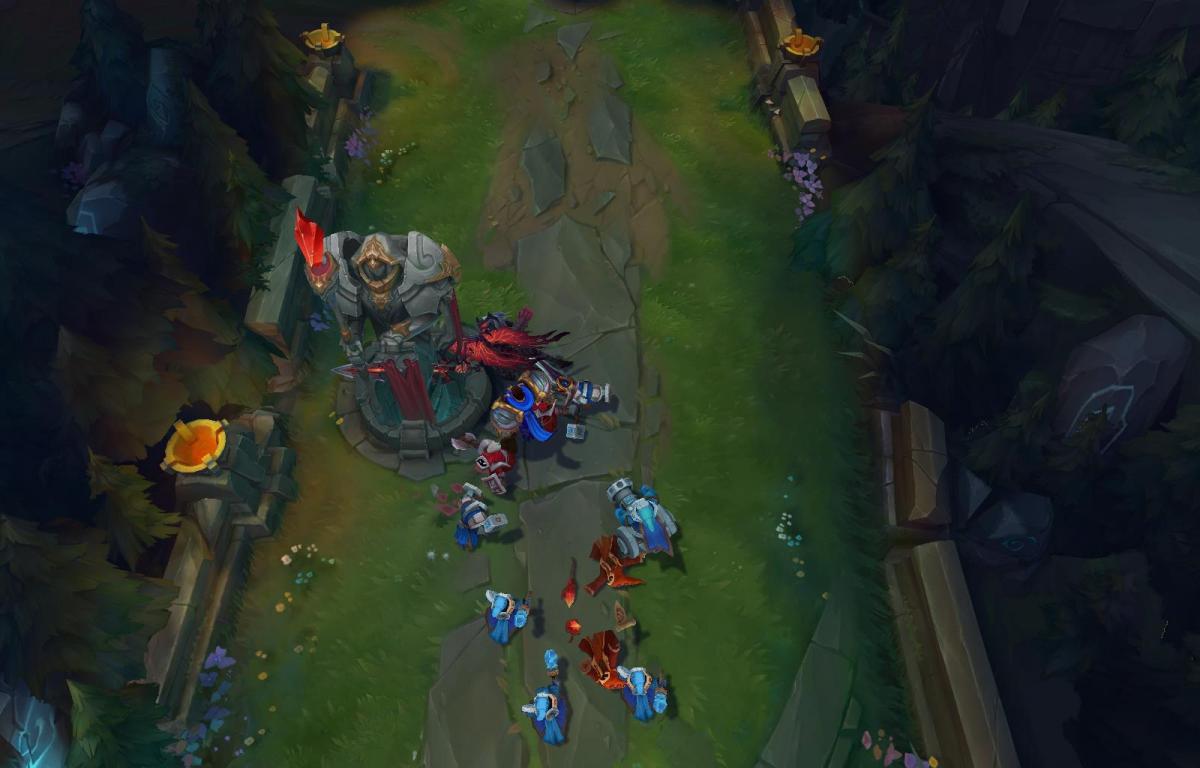
Each animated mesh consists of a skeleton - a framework of hierarchical bones - and a mesh of triangles (see the image of Garen from earlier). Each vertex of each triangle is weighted to between one and four bones so that as the bones move, the vertices move with them like a skin. Hence the name, “skinned meshes”. Our talented artists design the animations and meshes for everything and export them to a format that we load into League at the start of the game.
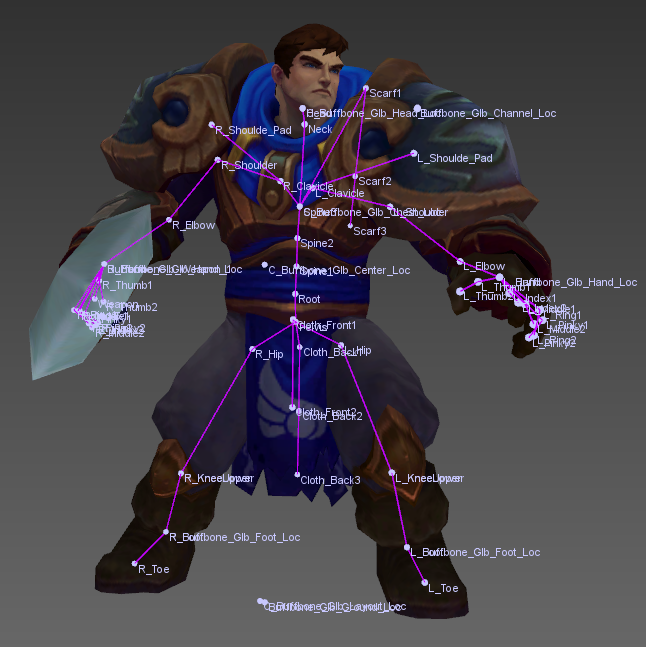
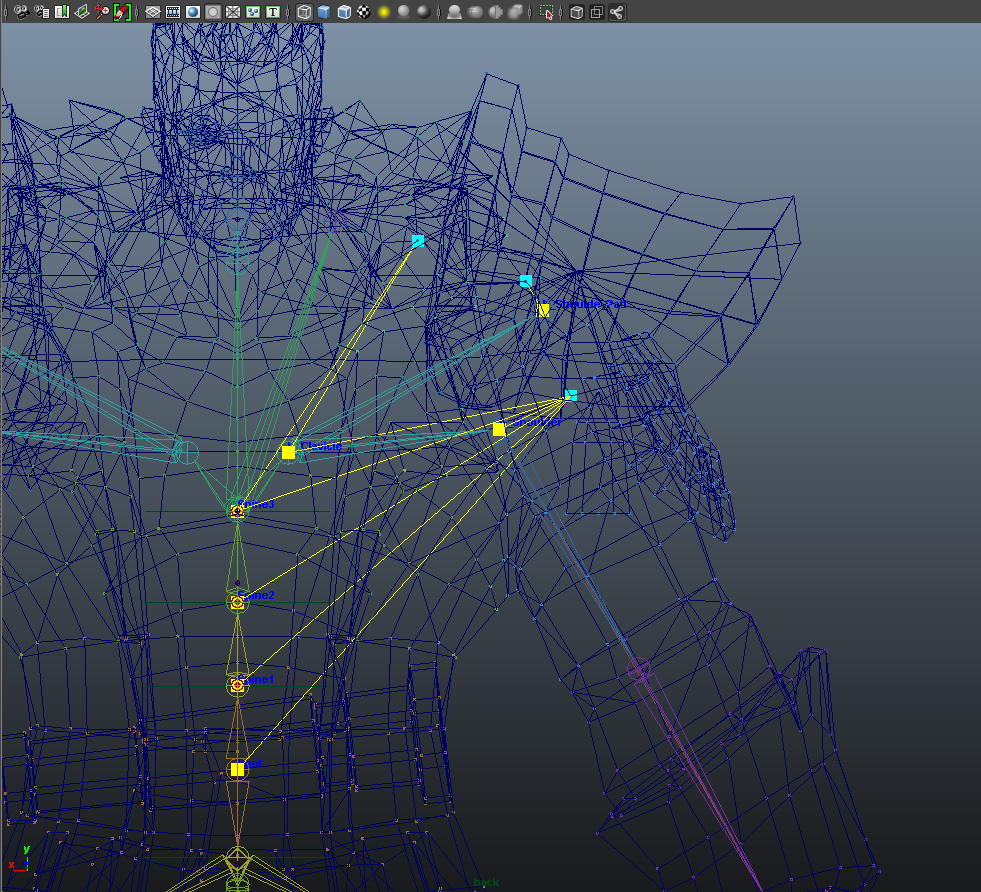
The above images show all the bones in Garen’s mesh. The image on the left shows all of his bones (with names). The image on the right displays selected vertices as light blue cubes, and yellow lines to indicate the connections to bones that control their position.
The skinned mesh shaders don’t just draw the skinned meshes to the frame buffer, they also render their scaled depth to another buffer which we later use to help us draw outlines. Additionally, the skinned shaders perform Fresnel and emissive lighting, calculate reflections, and modulate the lighting for the fog of war.
Render Stage 4: Outlines (inking)
By default, inking is enabled for our skinned meshes to provide sharper outlines. This helps delineate skinned meshes from the background, particularly in low contrast areas. The images below show inking turned off (left) and on (right).
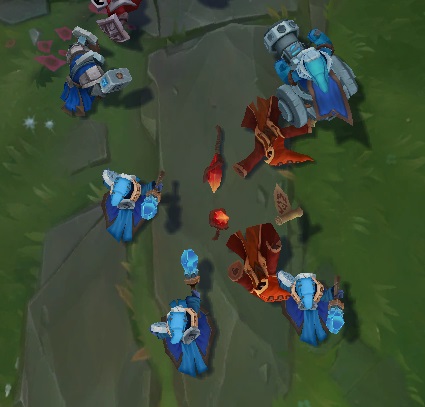
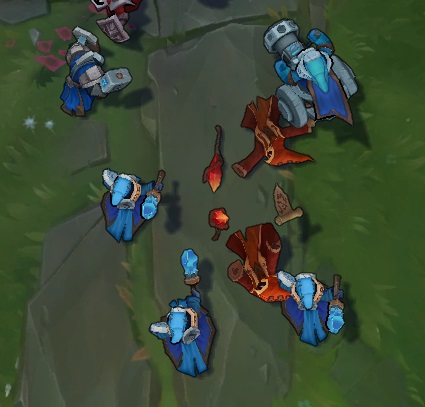
The outlines are produced by taking the scaled depth from the previous stage and processing it with a Sobel filter to extract an edge which we render back over the skinned mesh. This is done for each mesh individually. There is also a fallback method using stencil buffers for GPUs which cannot perform rendering to multiple targets at once.
Render Stage 5: Grass
To consider what’s involved in rendering water and grass, let’s take a look at another scene which contains both.
This is the frame without water or grass - just the static background geometry and some skinned meshes.
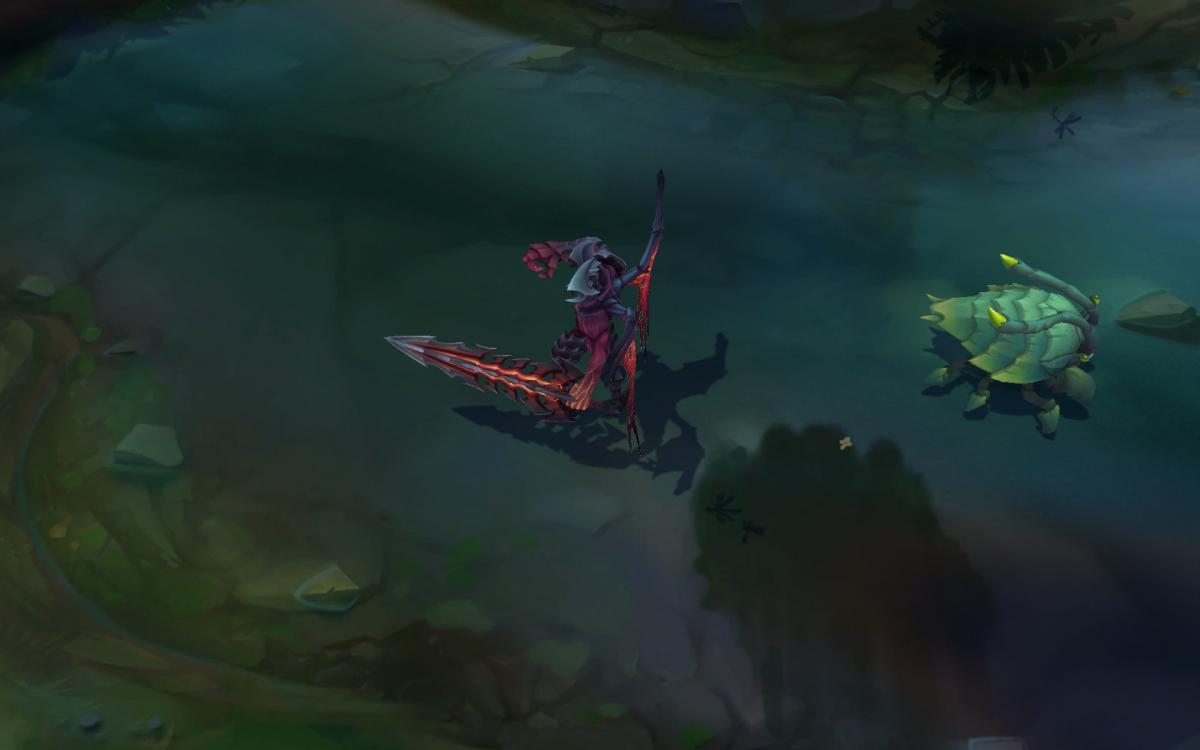
Note that the shadows for the grass are already part of the static terrain texture and are not rendered dynamically. Next we add the grass:
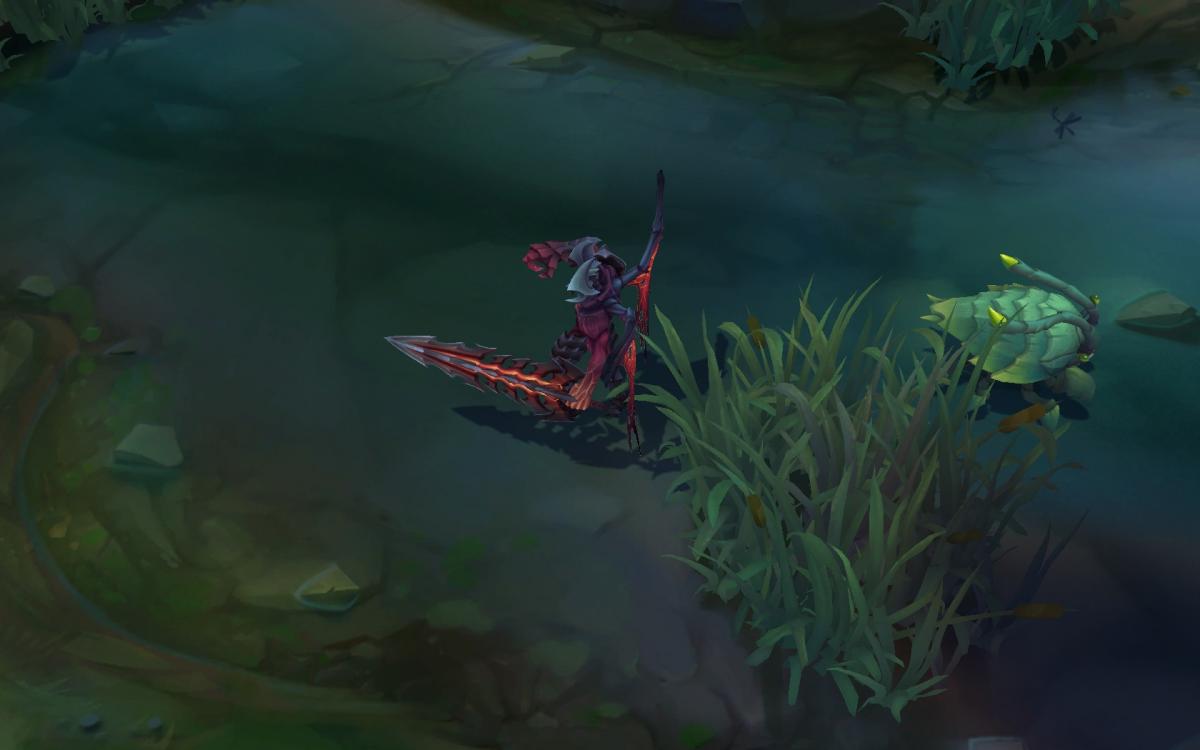
The tufts of grass are actually skinned meshes. This allows us to animate them as you walk through them and also to give them a nice little sway in the Summoner’s Rift breeze.
Render Stage 6: Water
After the grass, we render water using semi-transparent meshes with subtle animated wave textures. We then add lily pads, ripples around rocks and the shore, and some insects. All of these objects animate to help bring the scene to life.
To enhance the effect of the water (it can be a little subtle) I’ve kept the transparency of the water and ignored the static geometry underneath it. This highlights the water effects so we can better appreciate them for our analysis.
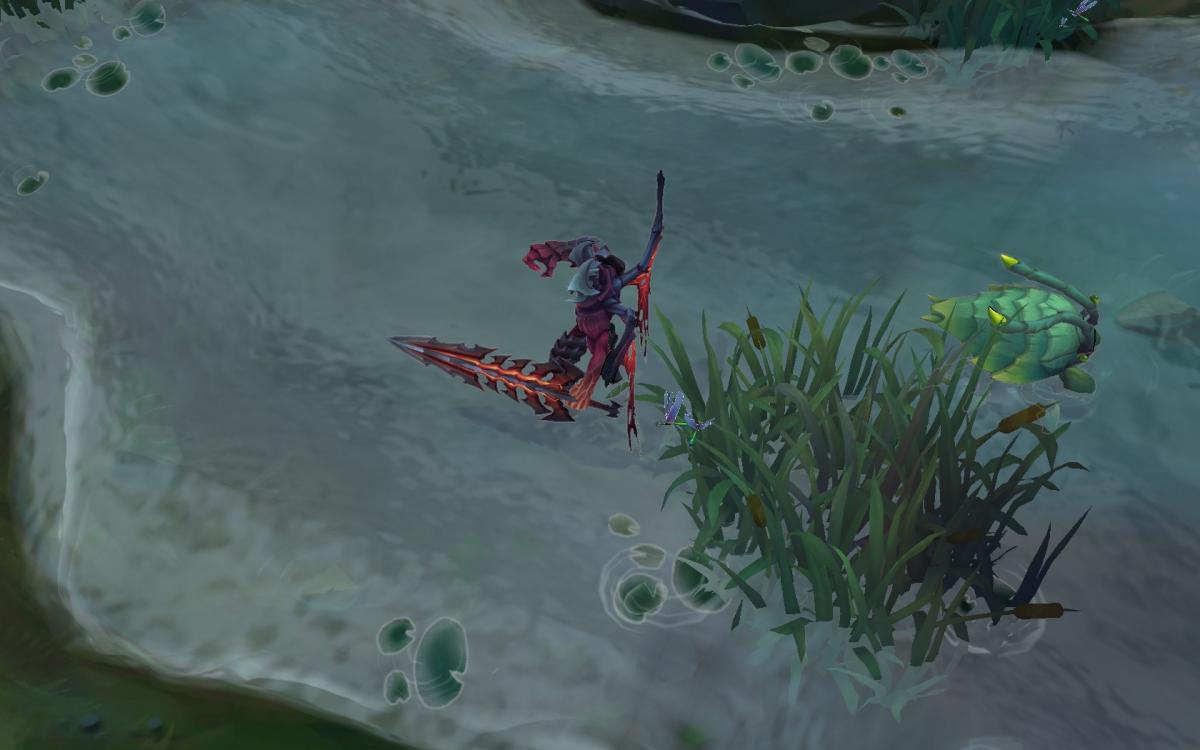
Highlighting all the ripples as wireframe we get:
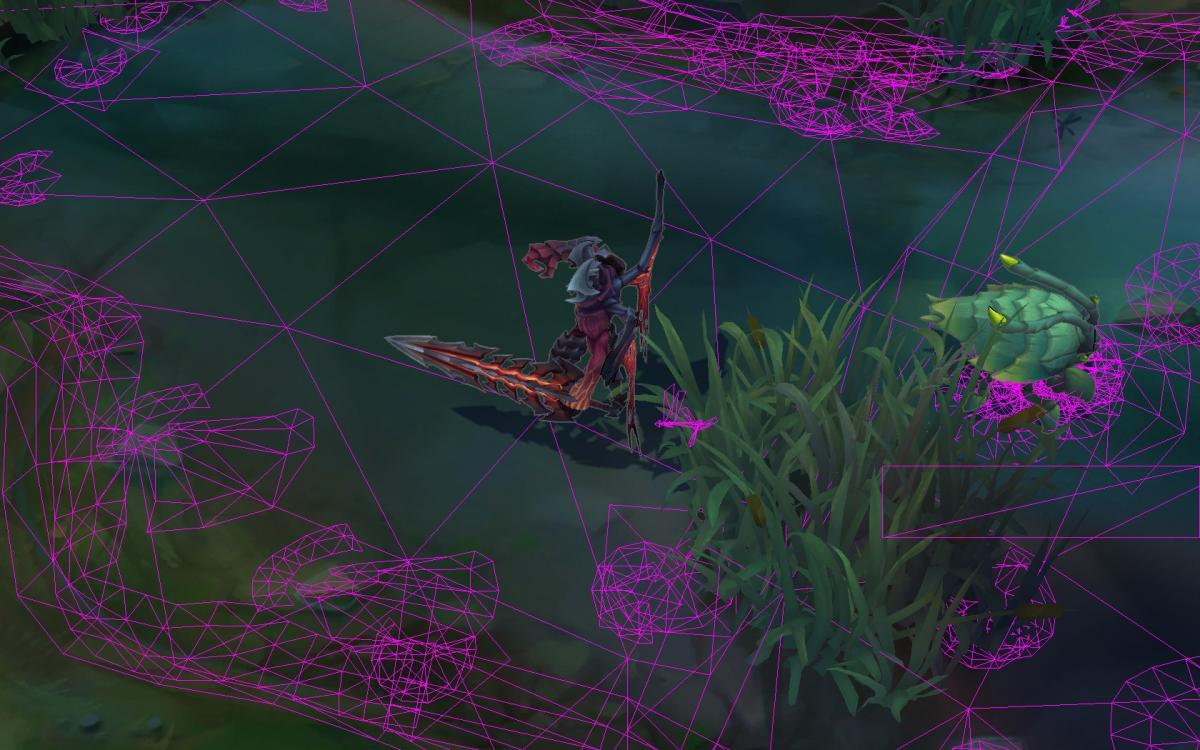
Here we can clearly see the water effects on the edges of river as well as around some of the rocks and lily pads.
When rendered normally and animated, the water looks like this:

Render Stage 7: Decals
Once the water and grass has been laid down, we add the decals - simple, flat textured geometry that is layered over the terrain like the Tower Range Indicator below.
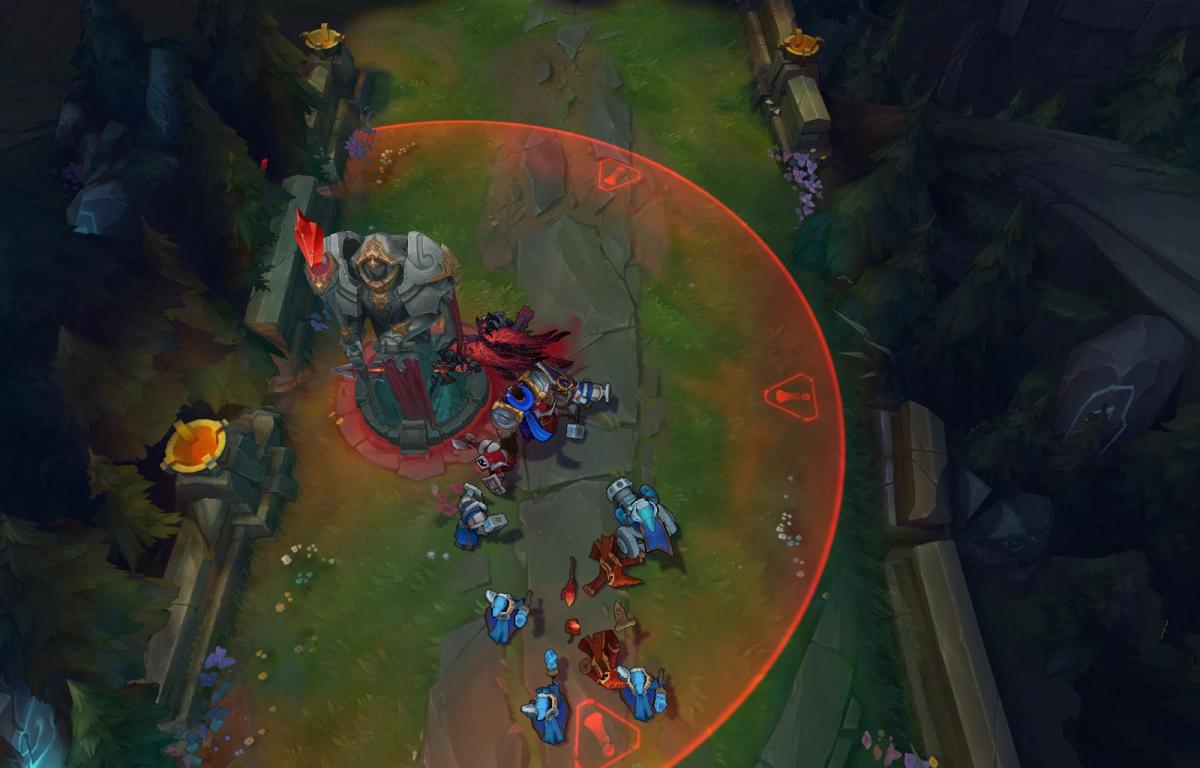
Render Stage 8: Special Outlines
Here we deal with some of the thicker outlines triggered by mouse over events or special activation states like the tower outline we see below. This is done in much the same way we outlined the skinned meshes, but we further blur the outline to thicken it. These highlights also stand out more since they happen later in the rendering process and can overlay existing effects.
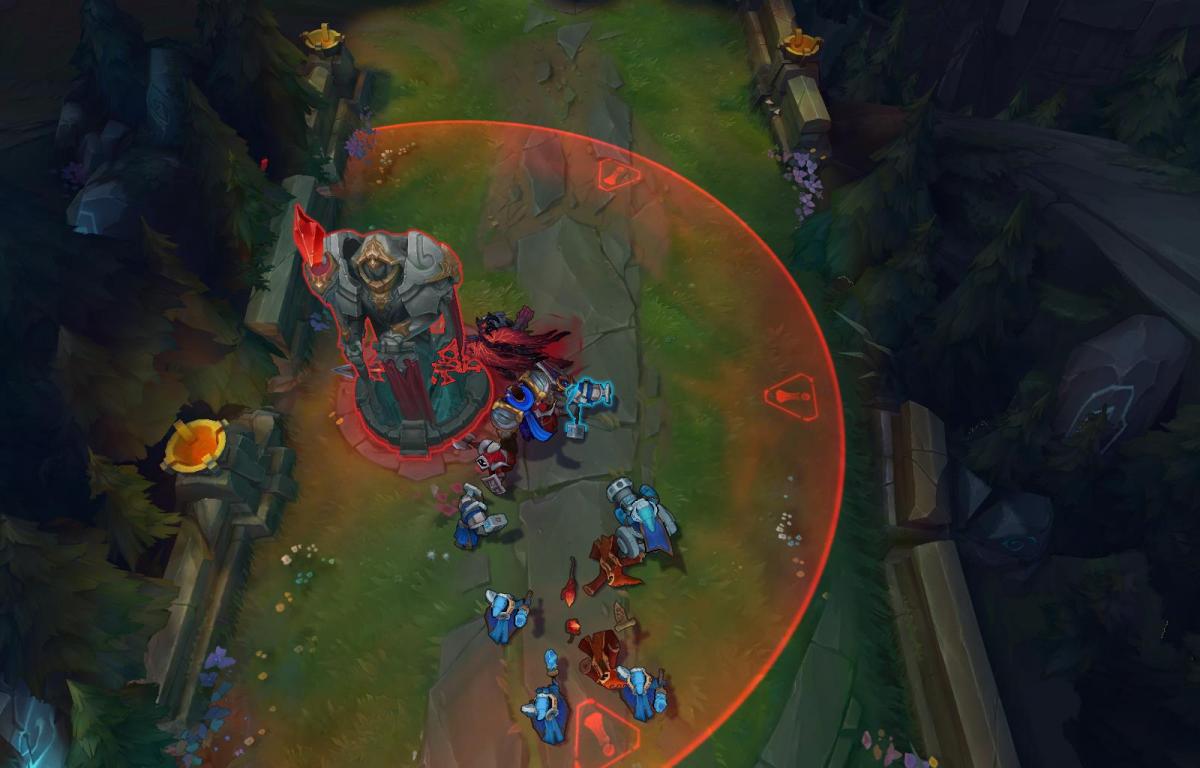
Render Stage 9: Particles
The next phase is one of the most important: particles. I’ve previously written about particles here. Every spell, buff, and effect is a particle system which needs to be animated and updated. This particular scene may not have as much action as, say, a 5v5 team fight, but there are still plenty of particles to display.
If we examine just the particles (with no background scene at all), we get this:
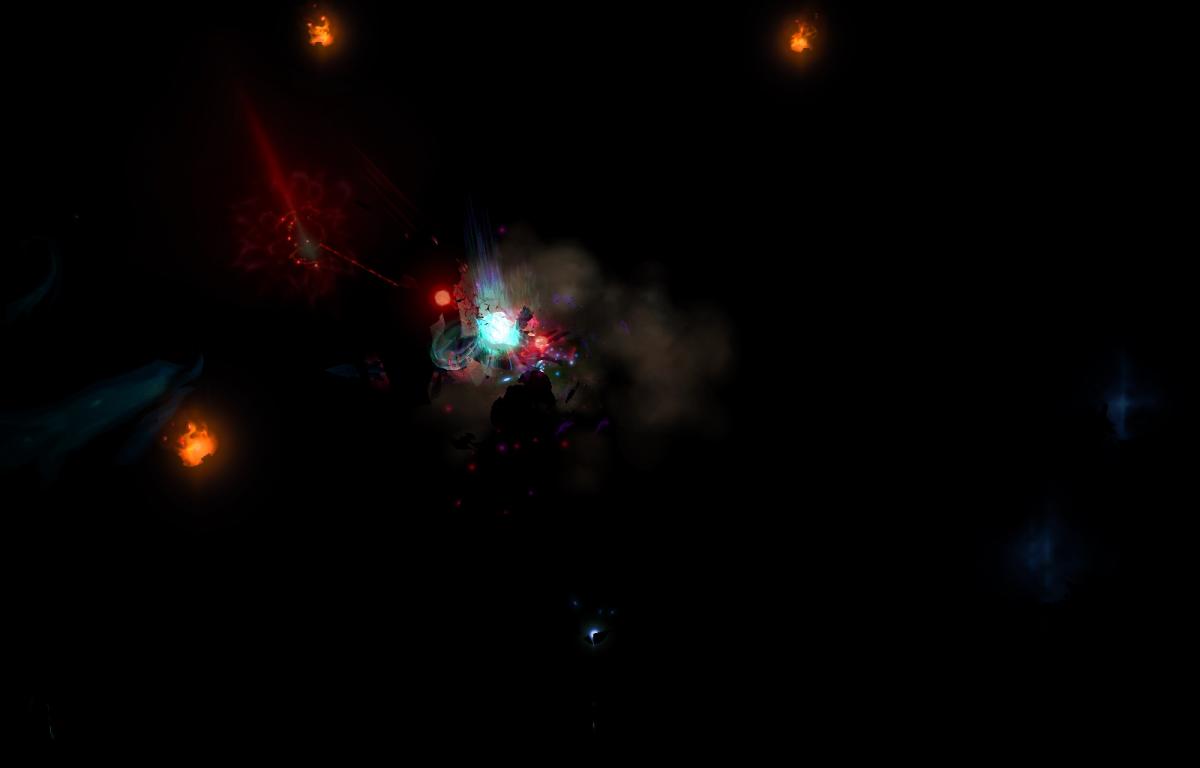
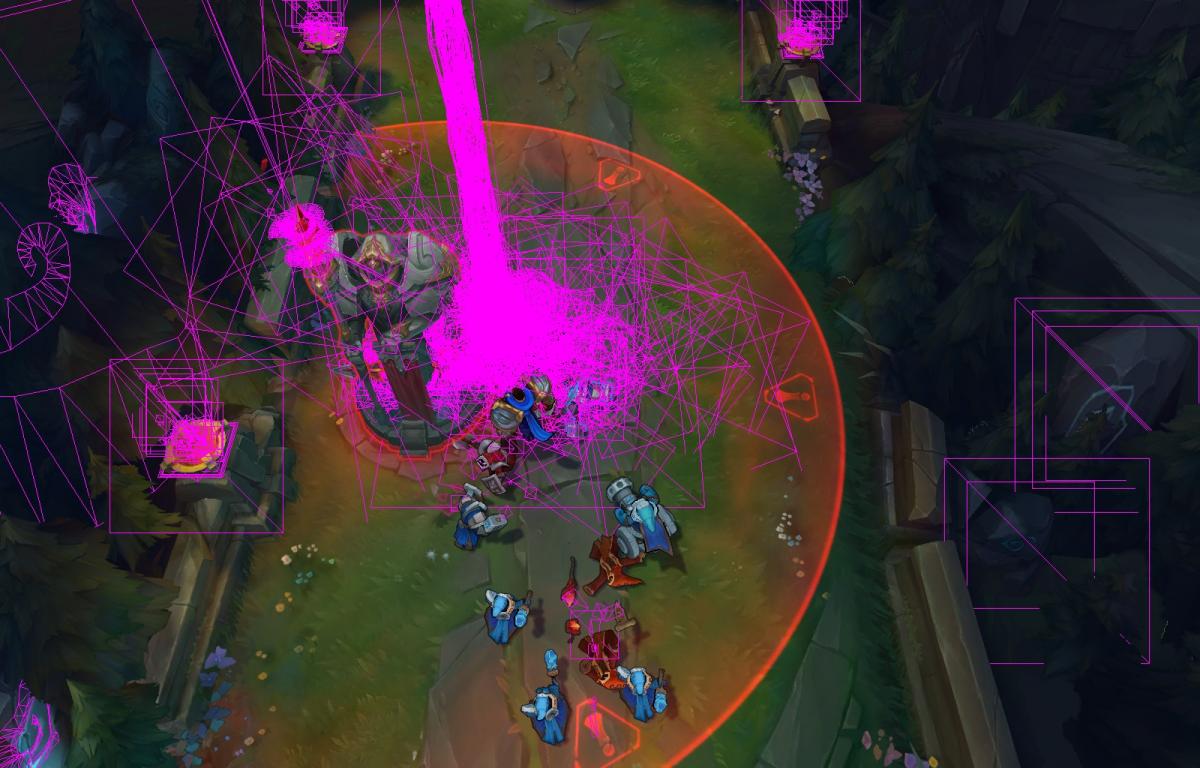
Rendering the triangles that make up the particles as purple outlines (no textures, just geometry), we see the following:
If we draw the particles normally, we see a more recognizable view.
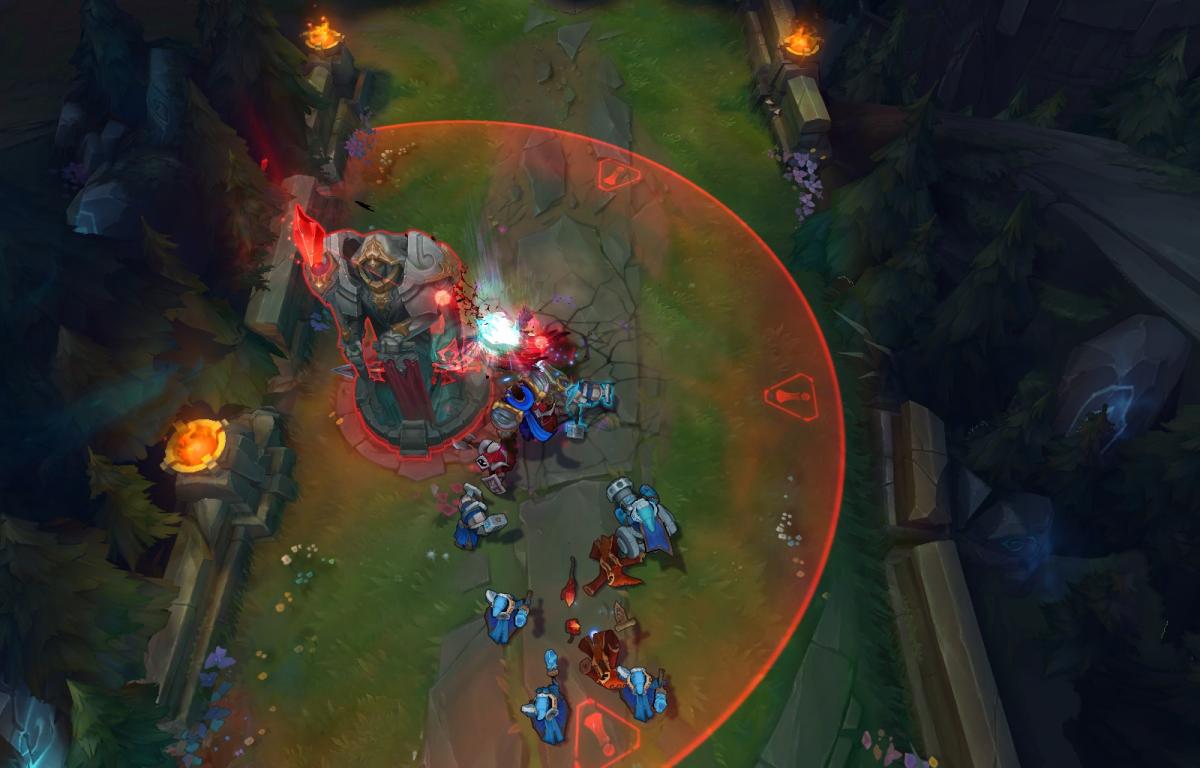
Render Stage 10: Post process effects
Now that we have the core parts of the scene rendered, we can give everything a bit of a polish. We do this in a couple of stages. Firstly we perform an anti-alias (AA) pass. This helps to smooth out jagged edges, giving the whole frame a cleaner look. This is a subtle effect in a static image, but really helps in removing the “pixel shimmer” which can occur when high contrast edges move across a screen. For League, we use the Fast Approximate Anti-Aliasing (FXAA) algorithm.
The image on the left is the minion before FXAA and the one on the right is the minion after. Note the softening of the edges.
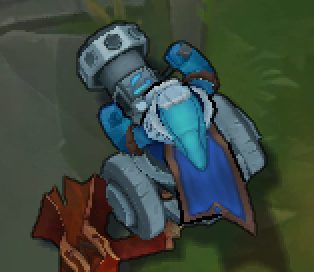
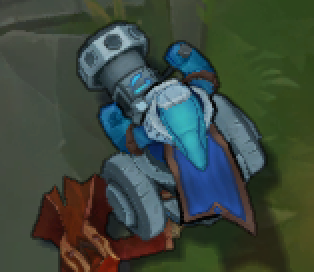
Once the FXAA pass is complete, we perform a gamma correction pass which allows us to adjust the brightness of the scene. As an optimization, we recently rolled the death screen desaturation effect into the gamma pass, removing the need to swap out all of the current visible mesh shaders for death variants which were individually desaturated.
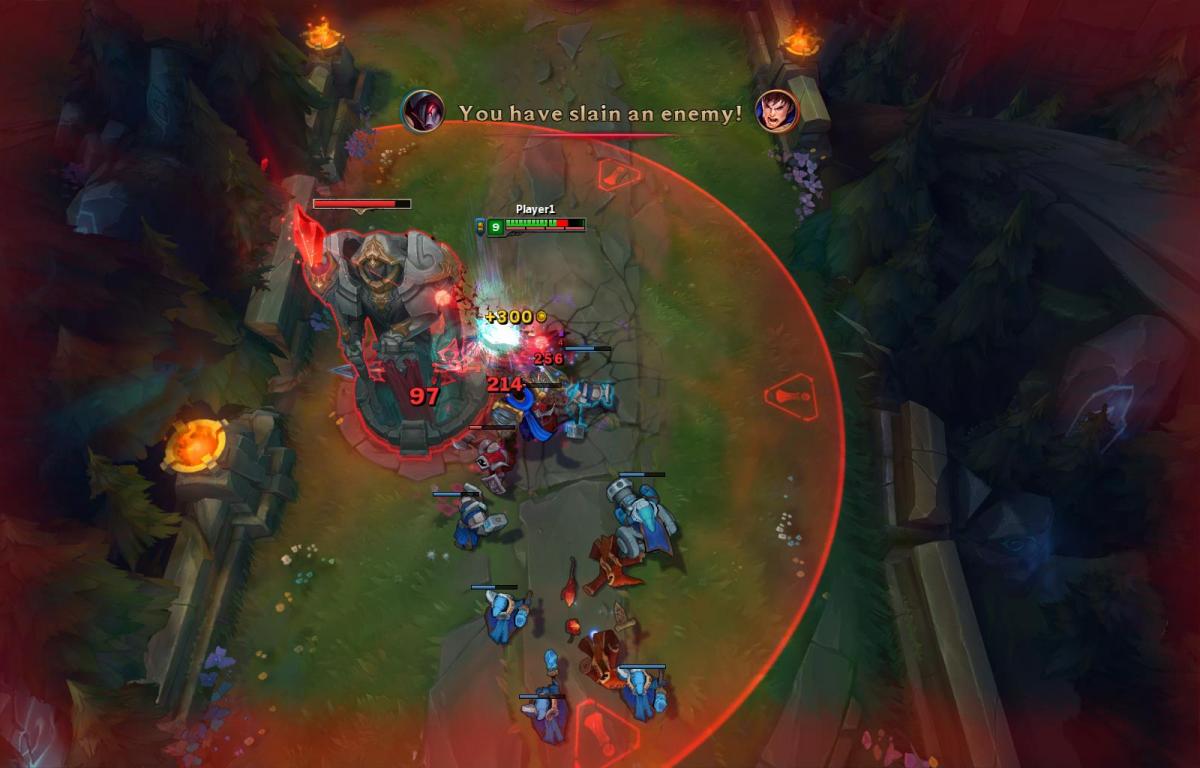
Render Stage 11: Damage & Health Bars
Next we render all the in game indicators such as health bars, damage text, and on-screen text as well as any full screen, non-post process effects like the damage effect below.
Render Stage 12: HUD
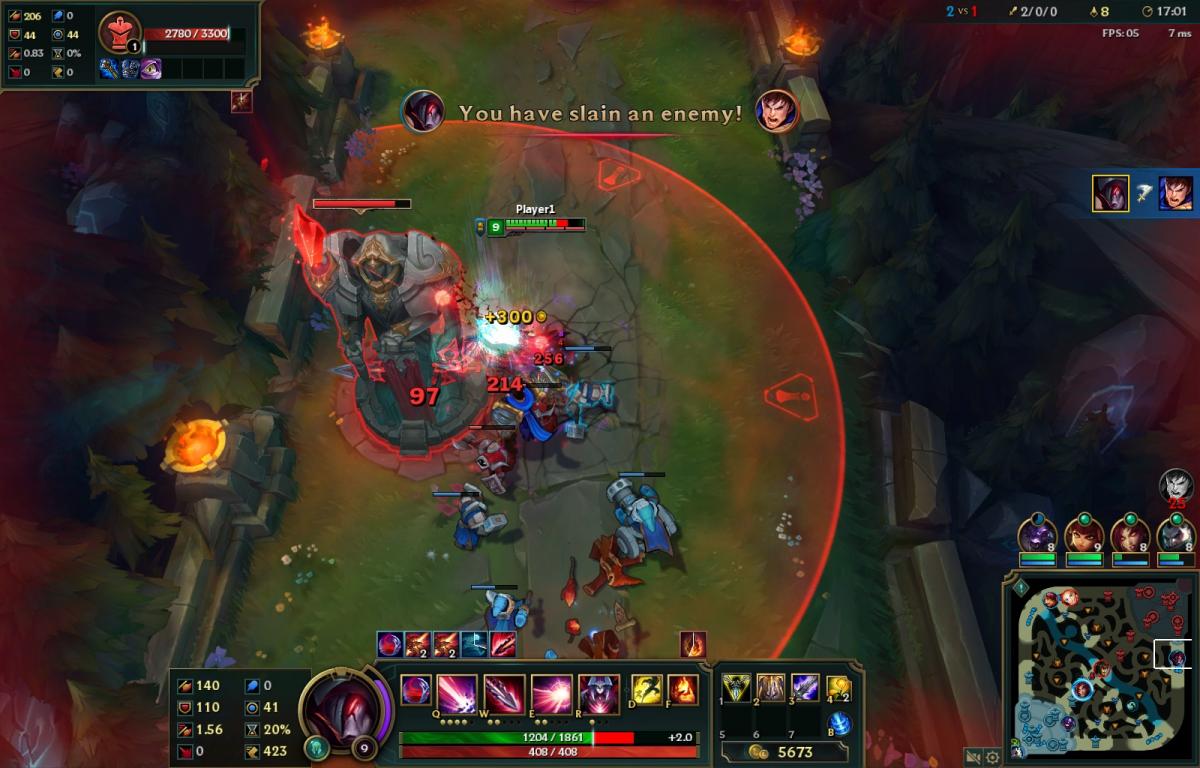
Finally, the user interface is drawn. All text, icons, and items are drawn as individual textures on screen, overlaying anything behind. In the case we’re analyzing, we use around 1,000 triangles to draw the HUD - nearly 300 for the minimap, and another 700 for the rest.
Putting it all together

And there we have our fully rendered scene. This entire scene was about 200,000 triangles, with 90,000 of them used for the particles alone. 28 million pixels are rendered by 695 draw calls. All of this work has to be done as fast as possible to ensure that the game is playable. To achieve 60+ frames per second this work must be done in less than 16.66ms. And this is just on the GPU side; all of the game logic, human input processing, collisions, particle processing, animation and submission of the rendering commands also have to happen within that same period on the CPU. If you’re hitting 300fps, then everything happens in less than 3.3ms!
Why Refactor the Renderer?
Now you should have an idea of some of the complexities involved in rendering a single frame of a game of League. But this is only from the output side - what you see on the screen is the result of hundreds of thousands of function calls to our rendering engine, which is constantly changing and evolving to best suit our rendering requirements at the time. This has resulted in a few different flavors of rendering code co-existing in the League code base as we address the new and maintain support for the old. For example, Summoner’s Rift does its rendering in a slightly different way than Howling Abyss and Twisted Treeline. There are parts of the renderer that are left over from older versions of League, and parts that never quite reached their potential. The Render Strike Team’s job is to take all of our rendering code and refactor it so that all rendering happens through the exact same interface. If we do our job well then you should notice no difference at all (except maybe a little speed up here and there). But once we’re done, we’ll be in an excellent position to make blanket improvements to all of the different game modes in League.
I hope this walkthrough of the League of Legends rendering pipeline was informative. As I mentioned at the beginning of this article, the intent was for a non-technical piece so that more people could have a better appreciation of what happens with every frame in every game of League. If you have any questions, just ask in the comments below and we’ll answer as best we can.