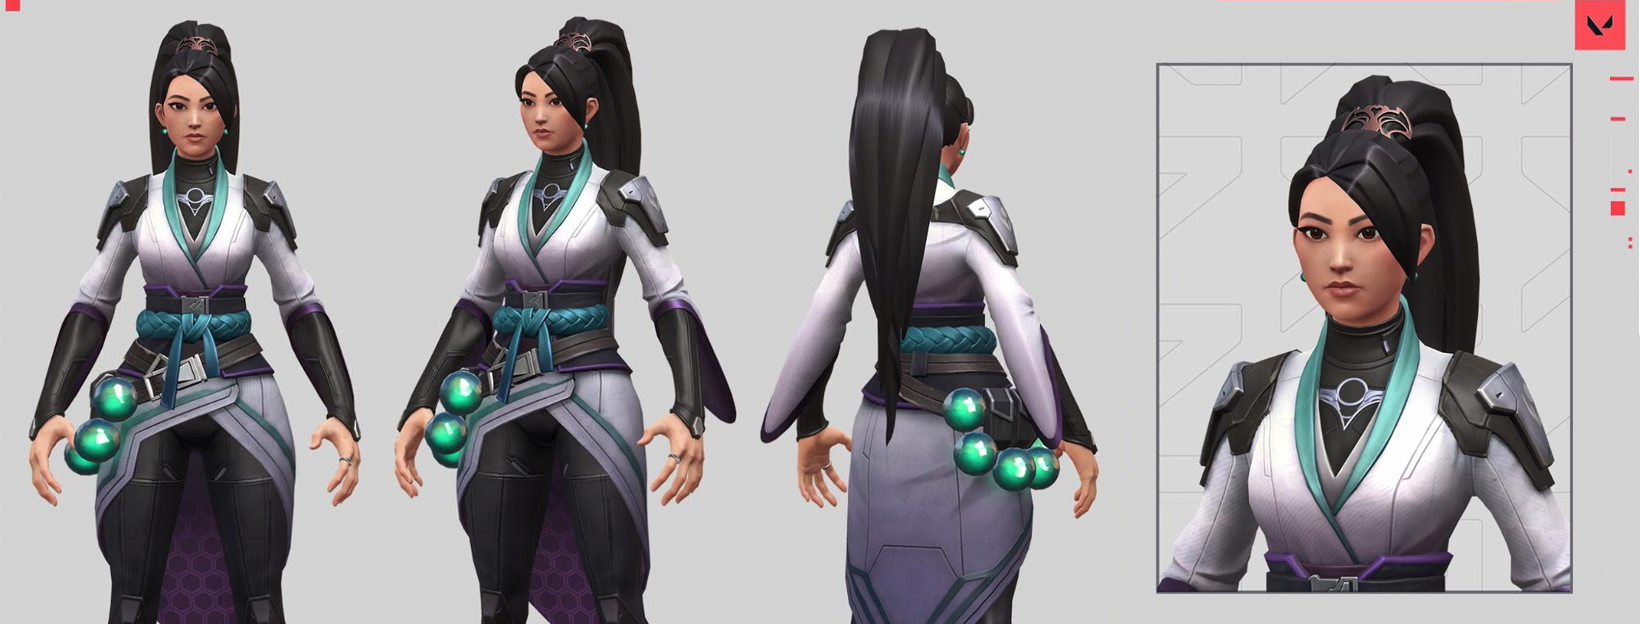
VALORANT Shaders and Gameplay Clarity
Hi, I’m Brandon “mochi” Wang, a software engineer on VALORANT’s Content Support team. We’re responsible for taking requests from artists and designers when they require deep game engine changes. I’ll be talking about gameplay clarity in VALORANT, and how we balance art style, performance, and game integrity. Art style is related to several aspects of game design - sometimes it means shaders that affect visibility in light/dark environments, and sometimes it means UI considerations like details in a playable space and off-screen clutter.
I’m specifically going to focus on shaders, which are an essential part of computer graphics, my area of expertise. Shaders are the programs behind what most people consider a game’s graphics - how a program running on your GPU takes in scene/game data and creates the pixels seen on screen. I’m excited to talk about this because the intersection of engineering, art, and design is a personal passion of mine.
The Balance
Computer graphics for video games have a simple goal - create an image that visually represents a world. This raises many other more complex questions - for example, there’s a great deal of active graphics research into how we best represent physics within a computer. With shaders, we’re basically simulating light physics.
This can be challenging because games have tight performance requirements - each frame must render in 6.9 milliseconds or less to hit a 144 FPS quality bar. Shaders have to cut corners and fake effects, so we often find ourselves making a critical tradeoff: realism vs performance. And remember, VALORANT is a competitive game, so we also need to consider how realism and performance factor into competitive integrity.
The Whole Triangle
Everything you see in a game of VALORANT uses a shader to render the pixels on your screen. Our three main pillars for VALORANT are the three elements mentioned above - performance, competitive integrity, and art. We want to make sure we’re hitting these pillars equally to create a visually appealing game that’s competitive and extremely performant.
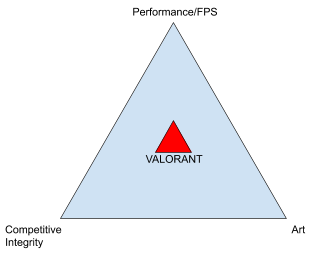
Each game has different pillars depending on what the development team is trying to accomplish. For VALORANT, we picked these three pillars as the most important (instead of, say, realism, immersion, or cinematics) so we want to make sure we’re ending up evenly in the middle of this triangle.
Ensuring Competitive Integrity
VALORANT’s target minimum spec GPU is ambitious - it should run on an integrated GPU on a CPU from 2012… so basically what you’d find on a thin, light laptop from that era. Shaders need to run well on this kind of older machine, but also we need to make sure higher-end machines don’t have a competitive advantage. This means we need to ensure there are no differences between low, medium, and high graphics quality settings that could change the competitive landscape. For example, we don’t have dynamic shadows in the playable space of the game, because people playing on lower quality settings (which usually cut shadows) would miss out on vital information. Instead, we focus on enhancing readability.
On older machines, we’re GPU-bound, meaning the CPU is often waiting for the GPU to finish its work before we can start the next frame. On newer machines, since GPUs have become more performant at a much faster rate than CPUs, we’re CPU-bound. This is why you’d want to turn down the graphics settings on an older machine, and why you wouldn’t necessarily notice a difference in your FPS from turning settings to high on a newer machine.
When we talk about readability, there are several categories we consider - material response, domain-specific shaders, and features to cut when scaling down quality levels. Let’s take a look at each of these, and how we approach them for VALORANT.
Material Response
First, let’s take a look at material responses, and how we simulate real-world lighting physics within the constraints of a game.
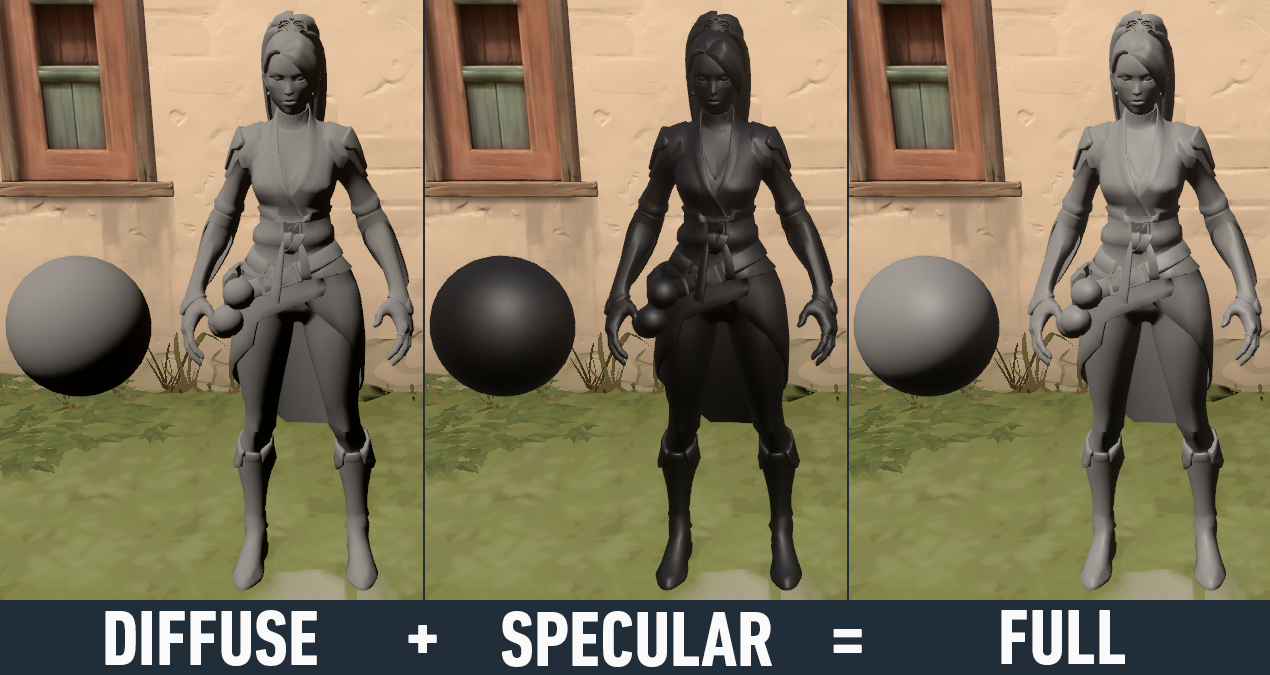
In the real world, light from sources like the sun or light bulbs bounce around on different surfaces, changing properties on each bounce, so that when it hits your eye, you register it as seeing a certain color in a specific direction. This is the type of physics we have to fake, which we accomplish by simplifying into three main components: diffuse, specular, and ambient.
Diffuse creates a matte/chalky feel.
Specular creates a shiny/plasticky feel.
Ambient is indirect light which brightens everything, even when out of direct sunlight.
We create ambient light in a unique way on VALORANT - more on that later. Let’s first take a look at diffuse and specular light, why they’re important, and how we simulate them.
Diffuse
A material’s “diffuse” response basically creates a matte appearance.
Real world examples:
chalk, pieces of plain paper
Lambertian Reflectance
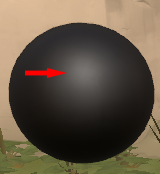
The physics term we borrow here to describe the light’s behavior is “Lambertian reflectance” - broad lighting that doesn't depend on where you view it from. In code, we represent this as 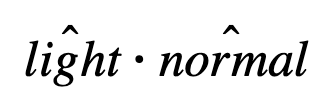 , where “light” is the direction towards the light source, and “normal” is the direction facing directly out of the surface. This is a dot product, which basically means there’s always a brighter appearance on the surface facing the light directly.
In the image below, we’re only using on each of the models. This is the most basic visualization of a matte object.
The matte part of a surface. The most basic, common type of diffuse lighting.
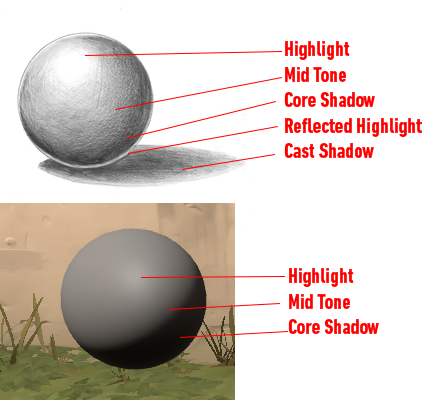
Half-Lambert
VALORANT builds on a concept called Half-Lambert to soften light. This was first created by Valve for TF2, and is used in highly stylized games to make dark areas feel less dark.
Half Lambert lighting.
Gradient Lambert
VALORANT’s extension of Half Lambert recognizes that we want to stray away from the closer-to-reality physics of light interaction, and instead borrow more from artistic shading principles.
This implementation allows us to borrow concepts from traditional art shading.
Where traditional Half Lambert brightens up an object’s core shadow by a constant amount, VALORANT’s extension gives brightness controls over the highlight, mid tone, and core shadow, and allows artists to brighten or darken according to preference. We take this one step further and allow the artists to even modify the size and locations of the transitions between them.
This is done in code by remapping to a [0,1] range, and using that to sample another remapping in a gradient texture. The gradient texture is generated by a UE4 engine modification aimed at creating these textures interactively. In this video you can see an artist tweaking the shading using some of our UE4 controls.
This technique allows us to avoid the performance costs of multiple dynamic lights - on VALORANT, we use a single light and style the heck out of it to make it look good.

VALORANT’s Gradient Lambert lighting.
Specular
A material’s “specular” response is most easily described as a shiny highlight.
Real world examples:
mirrors, metal, gloss
Consider how moving your head while looking into mirrors or metals changes what you see on the surface. We control this light reflection by adjusting the metalness or roughness of a surface - this basically changes the reflected color and the shape of the highlight.
Popular methods
Older games use a model known as Phong shading, which has an equation that looks like 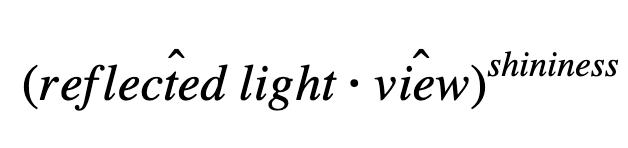 , where “reflected light” is the light vector reflected over the “normal” surface. The highlight sharpens and moves with your point of view.
This bright shiny spot that “reflects” the sun is a specular highlight
Modern games will often elect for a more complicated specular model, of which there are many, including Blinn-Phong, and Beckmann.
These are great specular models that are computed using virtual point lights. VALORANT’s approach stems more from a technique using a panoramic HDR image. This allows us to have complex specular lighting in our scene, without adding many shader instructions for computing specular light contributions from every light source.
Roughness
The main difference with the specular methods above is how they treat roughness. Roughness is roughly how scratched up the surface is, but at a microscopic level. This means that a shiny chrome metal is less rough than one that has been brushed. Each of the analytic virtual dynamic light methods (Phong, Blinn-Phong, Beckmann) use an exponential function to drive this, with a lower exponent translating to a more rough surface.
If we’re using a panoramic picture, what we’re doing here is a bit of the opposite - we want to blur the HDR image to make the lighting it receives less sharp when the surface is rough. We have to take a bit of care in how we blur the picture to line up with how specular models behave. If we used a normal blur, like a gaussian blur, it wouldn’t be quite right - it would look like a blurry reflection instead of a rough surface. We blur with a Beckmann blur kernel to keep the highlights looking like highlights.
These different blurs are stored as mipmaps of the panoramic picture at a lower resolution, and we select the most appropriate mipmap for the roughness our surface has.
VALORANT Specular
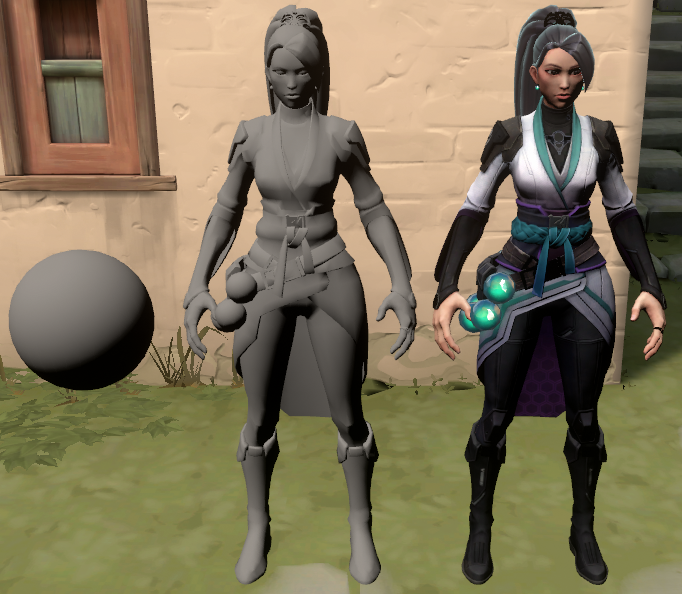
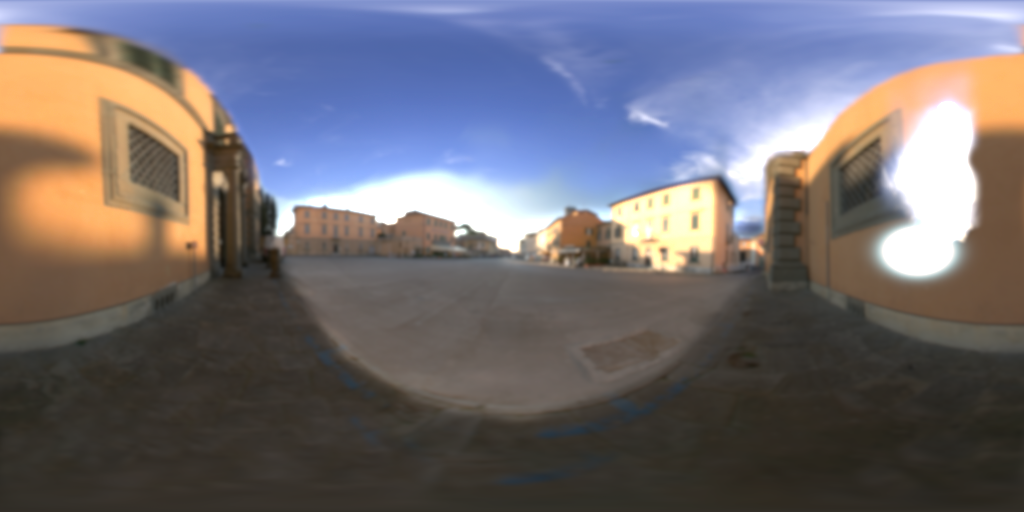
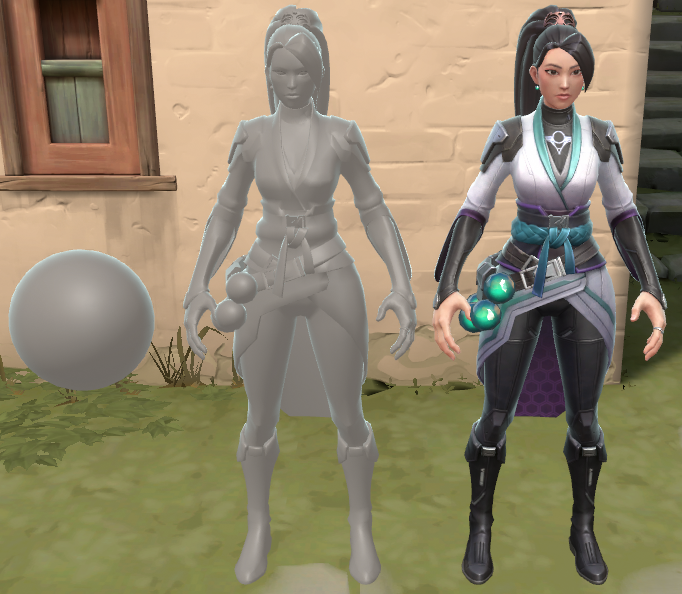
VALORANT uses real-life camera HDR captures or a precomputed game capture from several points on the level. We only use rendered scene reflections if the material is something very close to a mirror, like glass on a scope.
VALORANT is special here in that it uses only these panoramic reflections for specular highlights for the most part, without adding any virtual lights, which require quite a bit of GPU computation. Our artists paint hotspots on our static HDR images to drive the shape and behavior of the highlight they want. Since our diffuse response is mostly driven by a single directional light, painting a bright highlight in the direction of that light gives us coherence between specular and diffuse responses.
This image is a stock HDR cubemap that we often use to add realistic reflections. The values here are in floating point, so the bright white area to the right is actually hundreds of times brighter than the rest of the image.
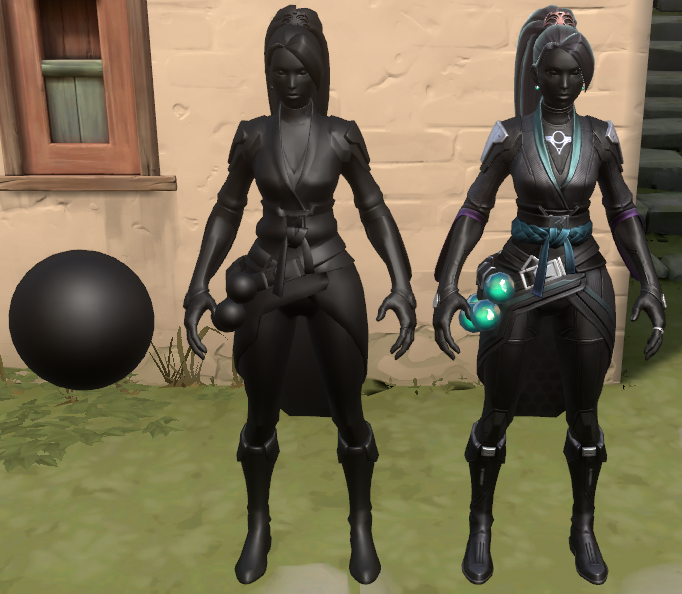
The models in this image all have the VALORANT implementation of specular light applied to them.
Ambient
“Ambient” light is a constant light over an entire object to simulate indirect illumination.
Real world example:
Shadows aren’t completely dark because light bounces off other objects, giving a bit of light to the areas in shadow.
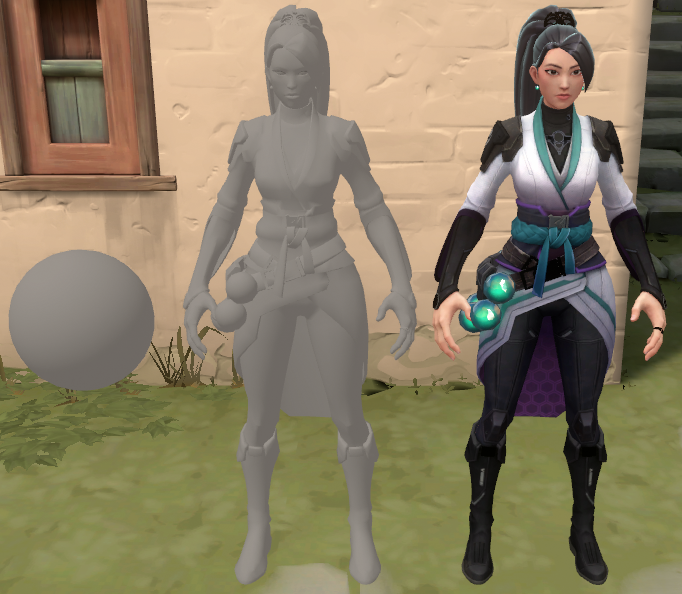
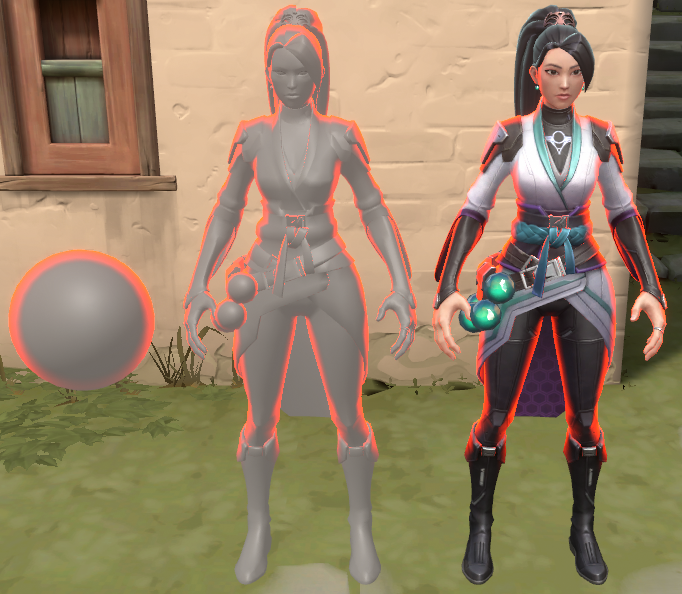
VALORANT doesn’t quite use ambient in a traditional way - our diffuse response is already styled not to go to complete black through the use of gradients. To keep indirect lighting consistent with the environment, we use Unreal’s Indirect Lighting Cache, which samples incoming static lights throughout a scene. We use these samples to measure ambient light at any given location on the map.
Each dynamic object finds the closest lighting sample, and uses it to brighten or darken an object’s diffuse and specular response separately. These are kept separate so we can use specular to darken more in darker areas, simulating being out of direct sunlight. We also tune the maximum “darkness” or “brightness” for each area across the map. This way, we still have objects that are able to respond to lighting in a level, while preventing values from going too high or too low.
These images compare the same objects in differently lit environments.
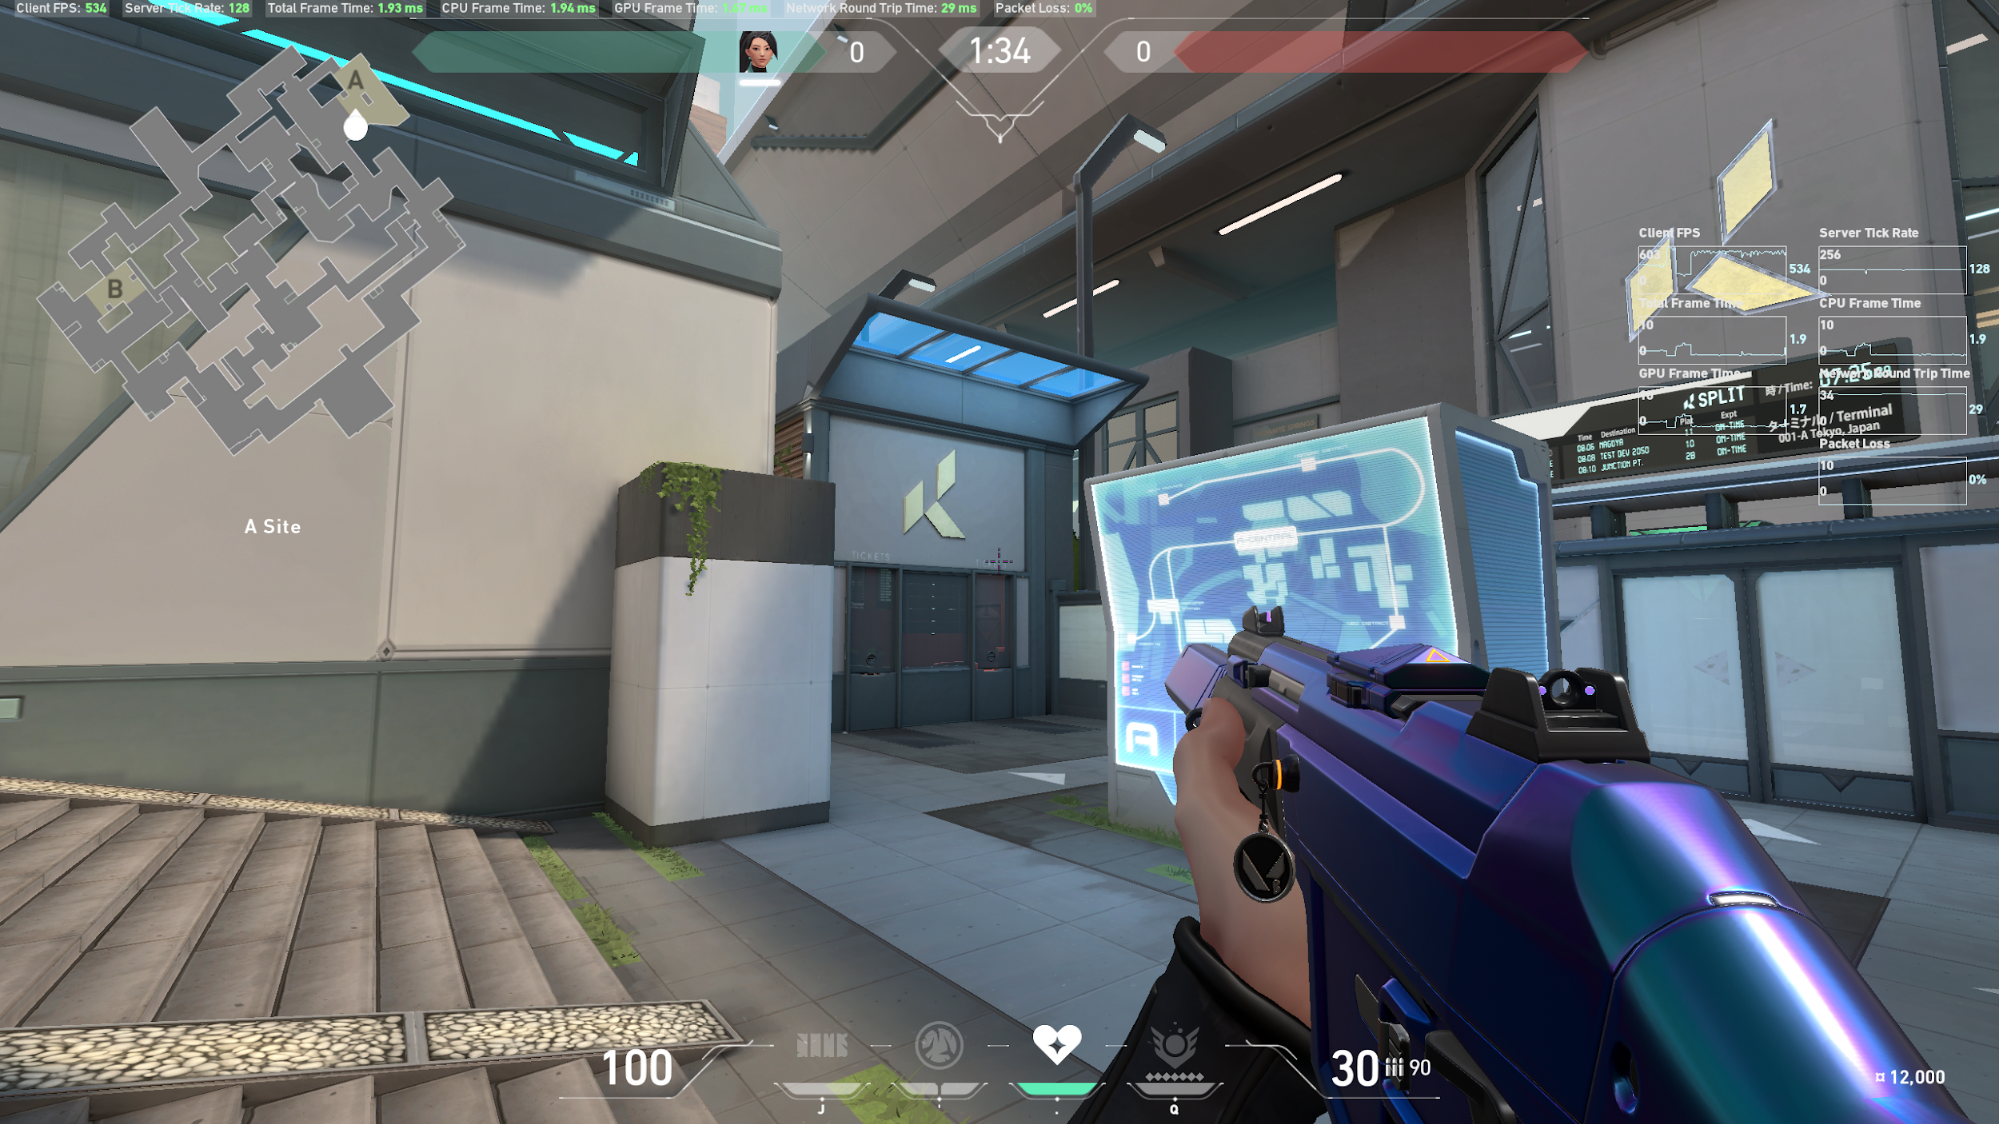
Categories of Shaders in VALORANT
VALORANT uses a forward renderer, which takes each object and tells it to render itself completely. This allows for some specialized optimizations at the cost of nicer lighting effects that you would get with a deferred renderer. However, we also get certain benefits like reduced impact on VRAM and improved performance on older GPUs with lower fill rates, and we’re able to have many different types of shaders that respond differently to the same inputs.
We have four main categories of shader inputs:
-
Characters (first person, third person, and in character select)
-
Weapons (first person and third person)
-
Environments (determined by dominant material response)
-
VFX (almost all one-offs)
Let’s take a look at each category, and then dive into some specific examples and a breakdown of their shaders.
Characters
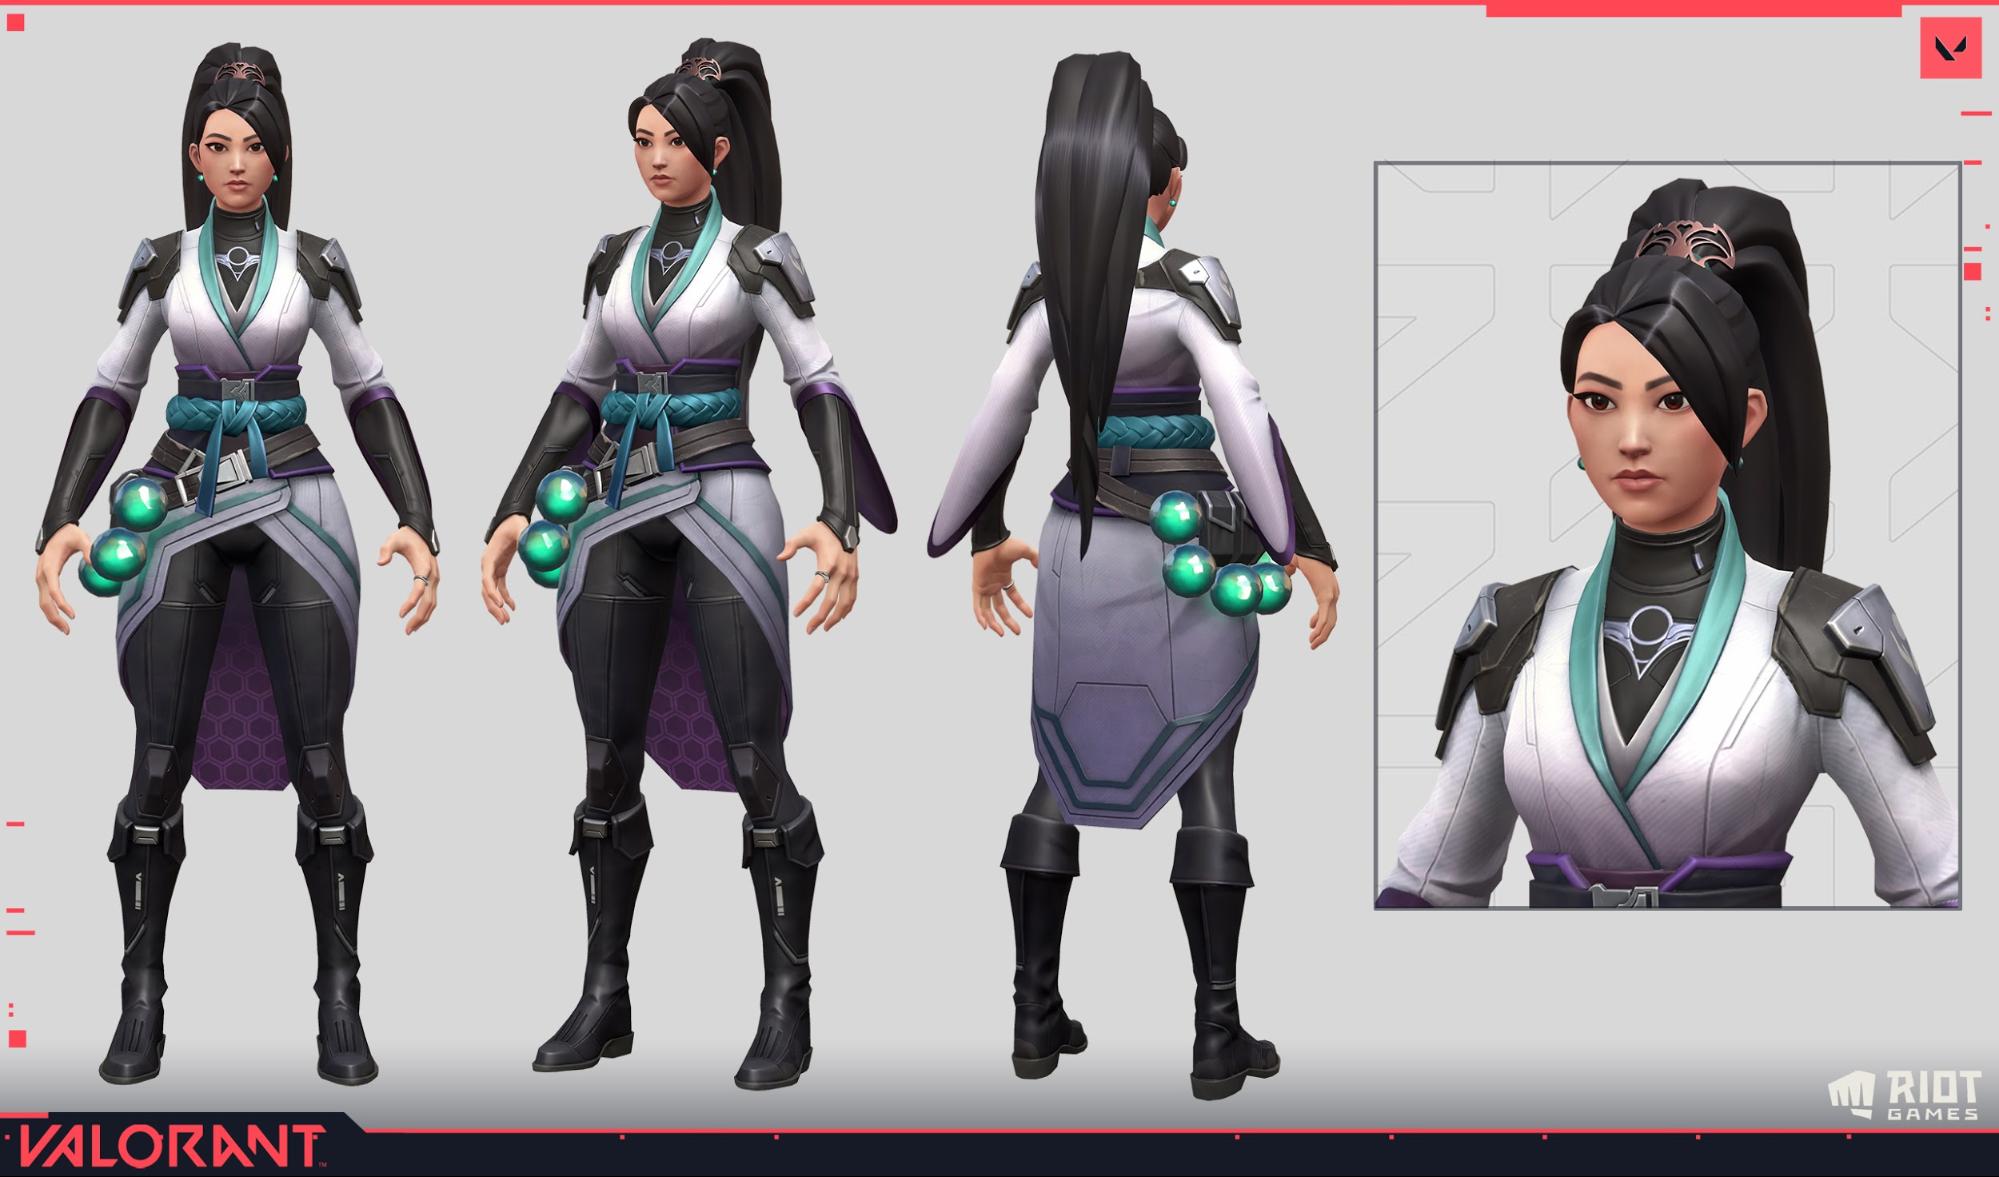
On top of the VALORANT flavors of diffuse, specular, and ambient, characters have a few extra features for clarity and style. We’ll take a look at several of these features, including friend-or-foe fresnel lighting, skin shading, textures, and depth adjustments.
Friend-or-Foe Fresnel
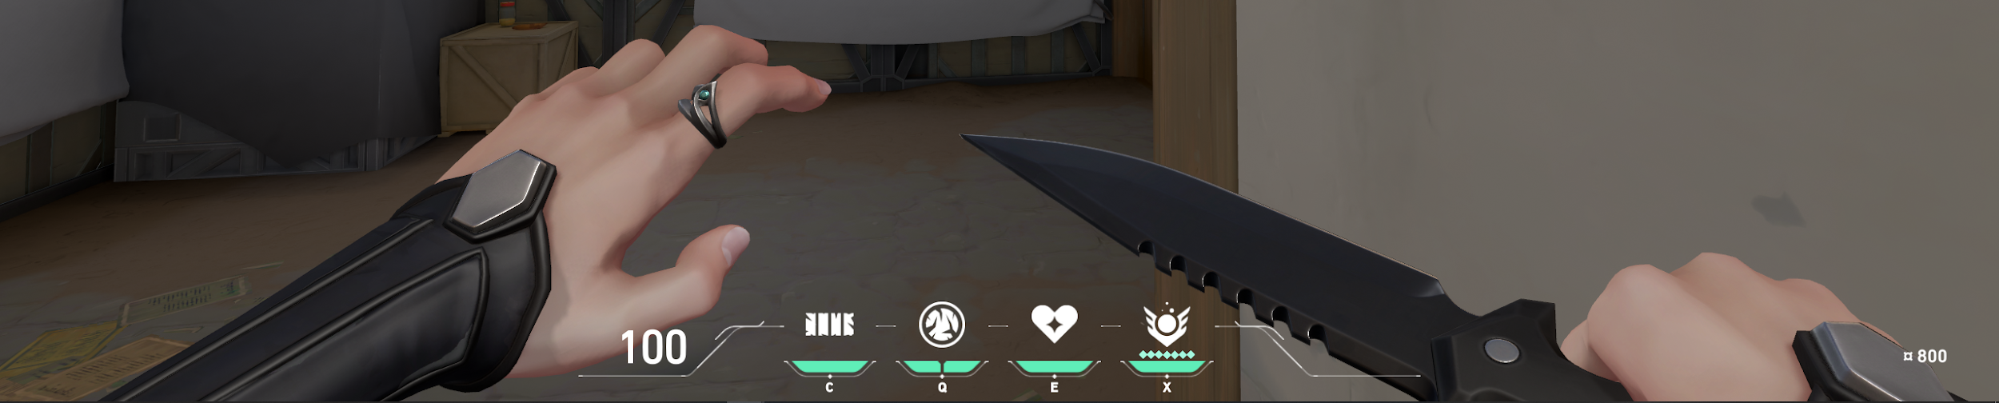
To add clarity to characters in VALORANT, we add extra lighting on grazing angles of the character (the angles facing away from you) to create a silhouette effect. This light is colored and styled differently for allies and for enemies - enemies have a red fresnel, and allies have a neutral, blue fresnel.
We modulate the fresnel effect to prevent it from being too bright and distracting, our goal being to mimic the way a beam of light would look if it was aimed directly down at the character. We achieve this by prioritizing up-facing grazing angles rather than down-facing grazing angles, and we show the effect more on the upper regions of a character.
Skin
Skin usually looks fleshy because of the way light travels through skin instead of reflecting off it. This is called subsurface scattering, and techniques to simulate this are typically expensive and create significant performance costs. In VALORANT, we fake it ourselves with more stylized shader features.
First, we modified the color of the diffuse falloff gradients to create more red in darker areas.
This got us close, but was still missing some of that fuzzy/translucent feel. Our artists referenced ZBrush’s wax preview material to address this.

By deconstructing it into an underglow with a specular-like response, we can modulate it to have an increased effect in darker areas, away from bright light.
Characters use a channel of vertex colors (which live on the mesh itself) to mask this effect on or off. Using vertex colors saves us an extra texture, because the change is subtle enough.
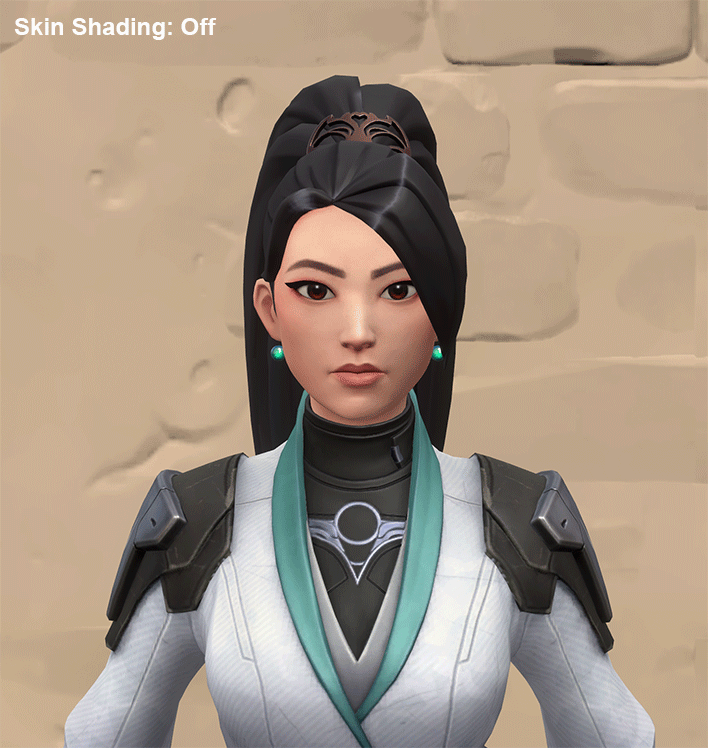
Without the skin shader, the characters look more gamified.
Textures
Characters, in their most basic form, use 4 textures:
-
Albedo/Base Color: the general color of a surface, which adds surface variation without increasing geometric complexity.
-
MAER: metallic (the highlight and diffuse response), ambient occlusion (creates shadows that add depth), emissive (masks areas to show specific colors directly), and roughness (the shape of specular highlights).
-
Normal: Small surface detail that’s not modeled into the geometry.
-
Gradients:
-
Diffuse Lighting Falloff
-
Skin Diffuse Lighting Falloff
-
Skin Underglow Falloff
-
Enemy Fresnel Angles
-
Ally Fresnel Angles
-
We don’t add specular as a control here, because we found that using an inverted roughness map as a specular map works pretty well. We’ve also packed together AO (ambient occlusion) and emissive because we rarely use them both at the same time; values below 0.5 are treated as AO, and values above 0.5 are treated as emissive.
Depth Adjustments
Depth is critical for character readability, which is extremely important in VALORANT - characters need to always stand out from their environment. Art style pillars help distinguish characters when you’re up close, but the further you get, the more the details break down.
To bridge the gap, many of our effects are modulated by depth, with shaders used to increase visibility the further characters are. For example, characters in the distance are brightened, and enemy fresnels are larger and more distinct. We clamp these adjustments just like we did with the ambient light/dark controls.
Let’s take a look at this scene, with two Sages at different distances.
If you look closely, you can see the far Sage is brighter and has more of her character surface covered in the red fresnel. It’s easier to see if we resize the two Sages and put them next to each other.
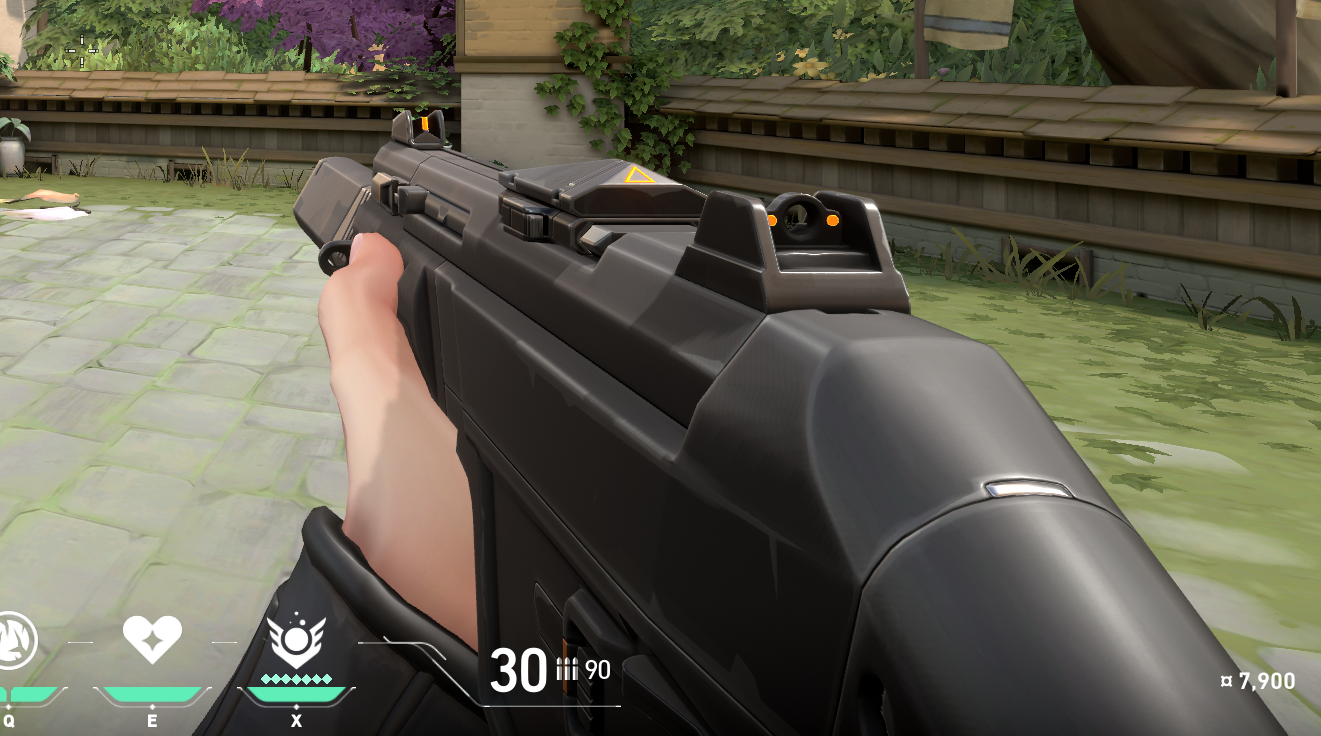
Cast Shadows
We have cast shadows only on objects in first person, like your own hands and weapon. This is to avoid cast shadows being a competitive factor in both effect (knowing where your cast shadow is) and performance (low-spec machines can’t reasonably run well with cast shadows).
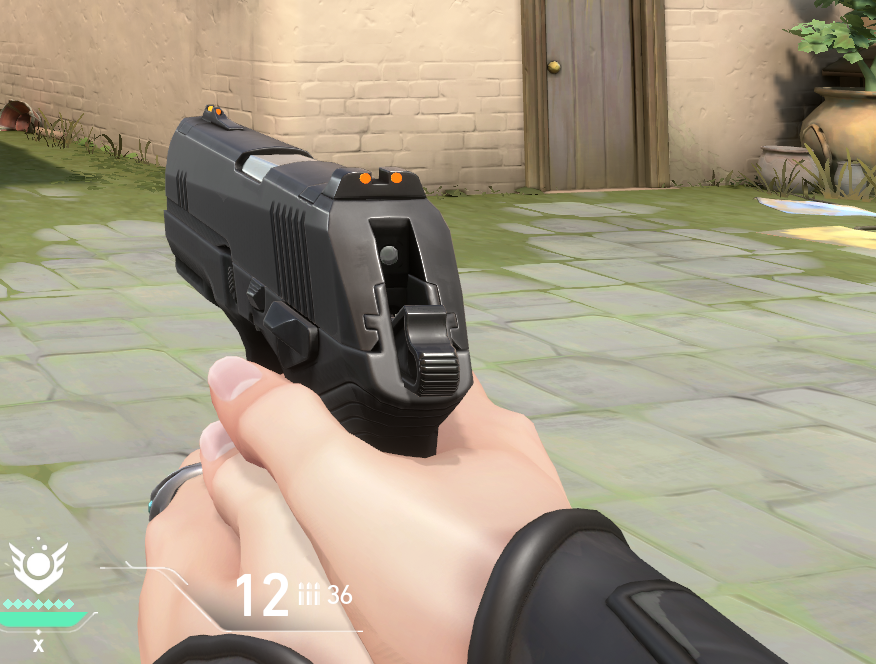
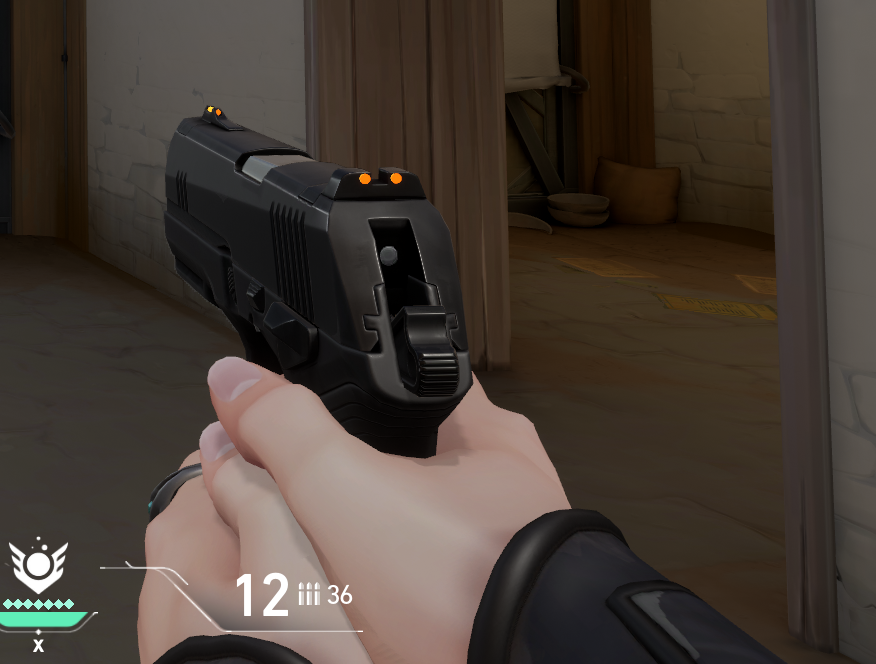
Weapons
Weapons use an older iteration of our diffuse styling - instead of working with a gradient, we use a smoothstep function to modulate .
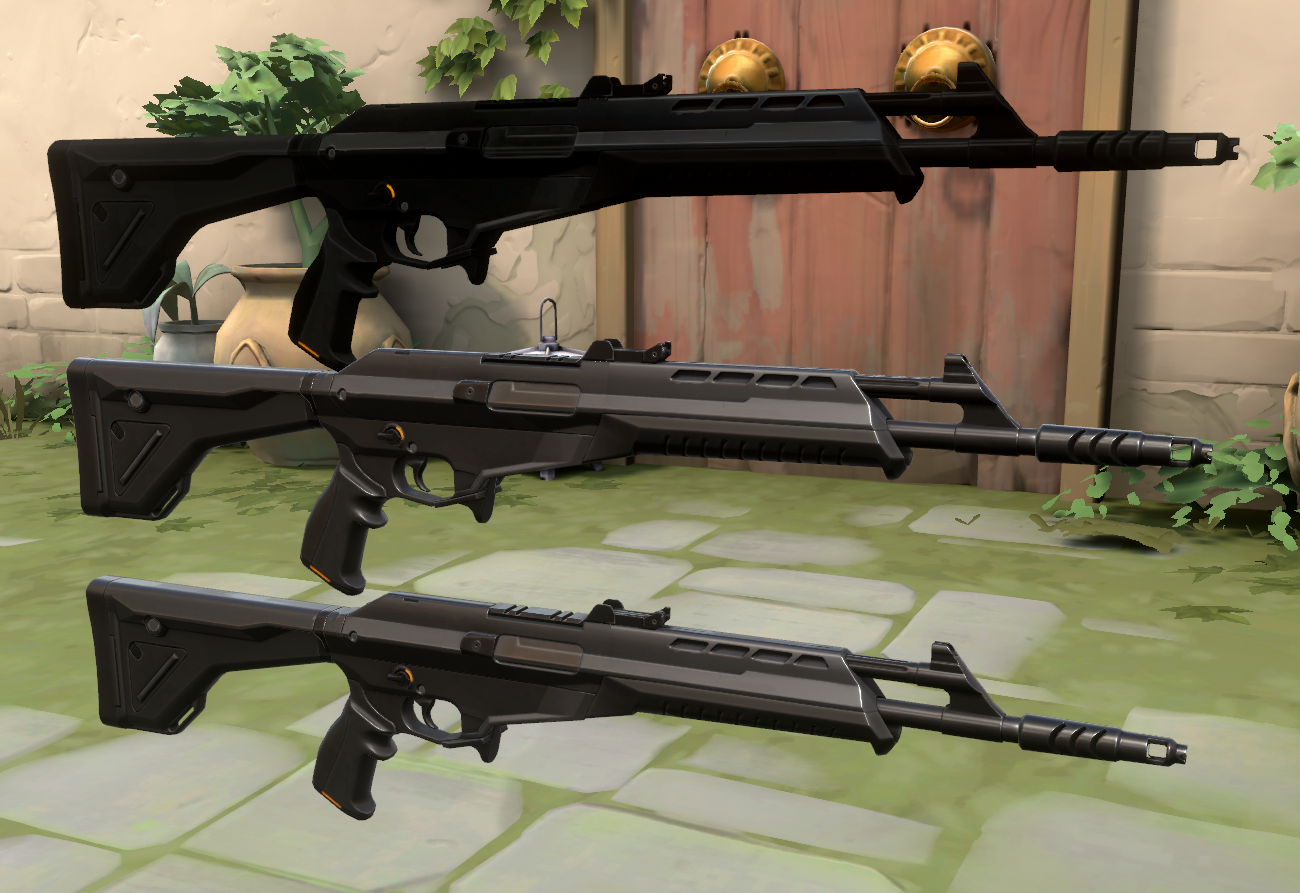
Top: Diffuse only. Middle: Specular only. Bottom: Full in-game Vandal.
Environments
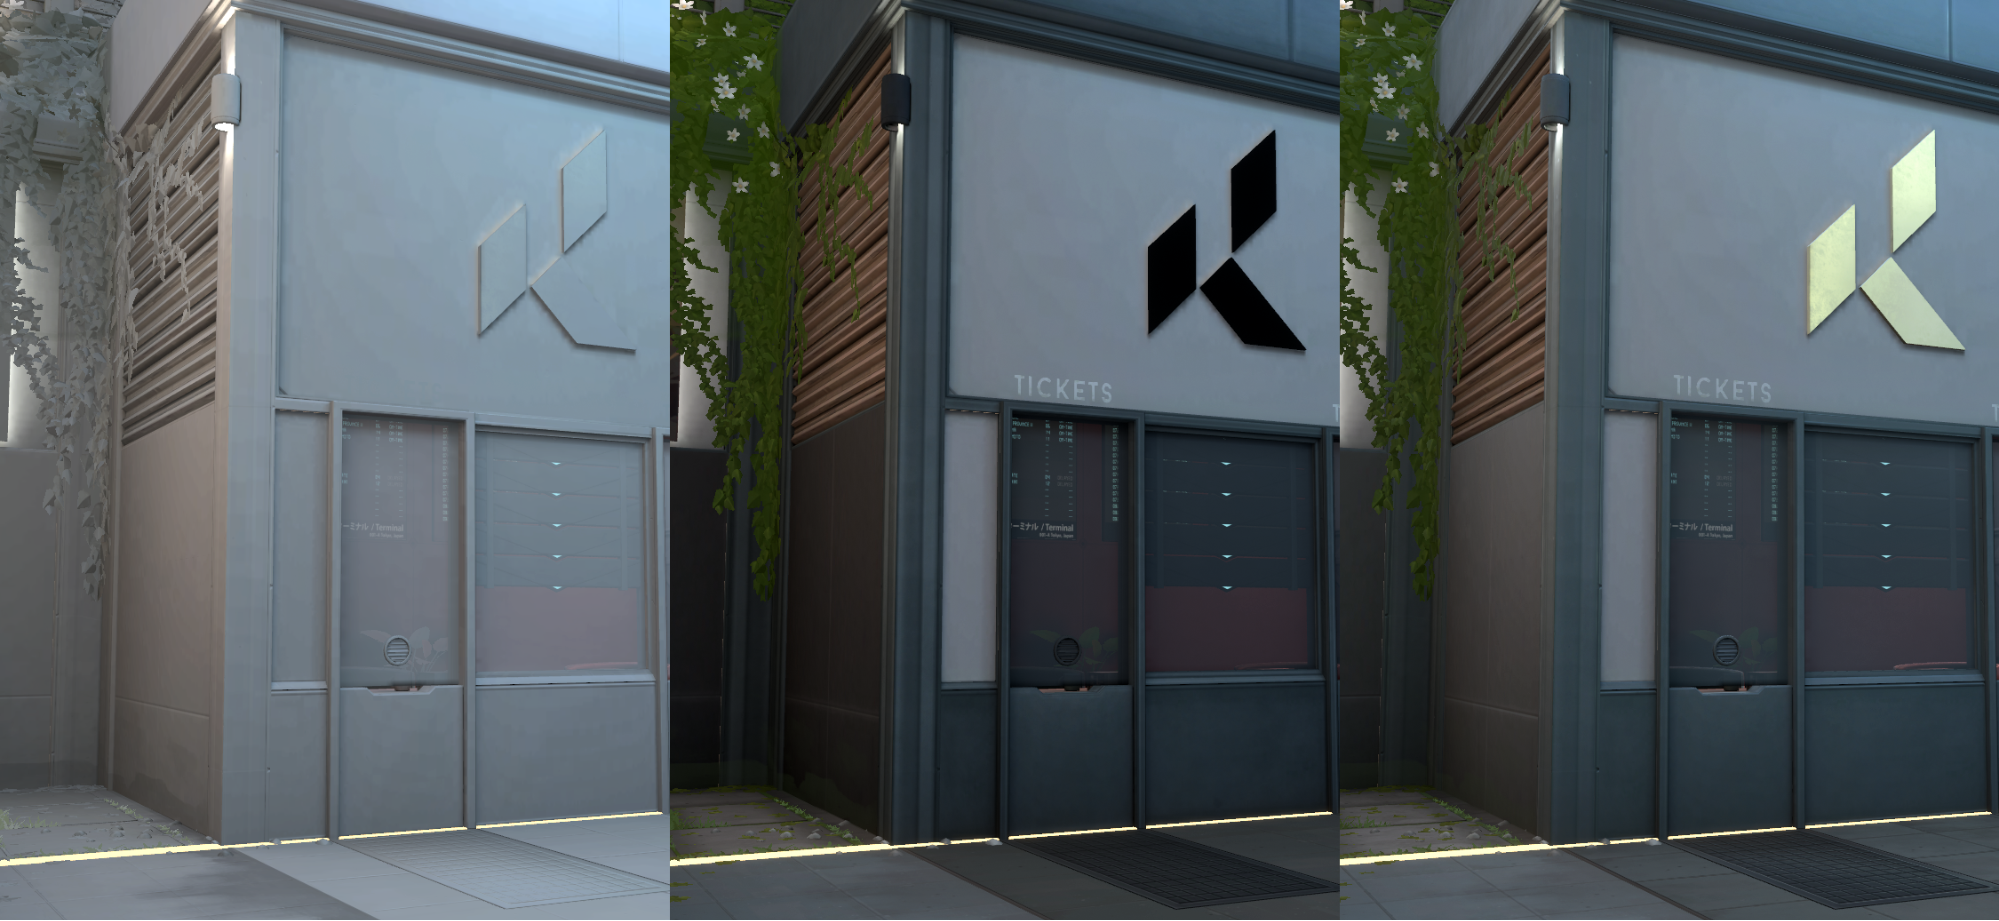
A game’s environment takes up most of a player’s screen, so the natural inclination is to make it as detailed as possible. However, the fact that it takes up most of the screen means we need to consider performance impact - environments should therefore be as cheap as possible. A small expensive adjustment here can cause huge overall framerate costs. And anyway, players are usually mentally blocking out the environment around them so they can focus on characters and abilities.
In other words, our environment shader needs to be extremely optimized to allow room for other effects while keeping framerates high in the heat of battle.
Lightmaps
Lighting is done in an offline environment, with the incoming light and dominant direction stored as textures using Unreal’s Lightmass. We use this for the diffuse response, and don’t actually style the falloff the same way we do for dynamic objects.
By doing this offline, we’re able to use many more lights than the single falloff light we use for objects, which means environment artists can control the look of the map in a more traditional way. Lightmaps allow us to do more advanced lighting effects (like shadows) because objects lit with lightmaps are the ones that never move during a game.
Here’s the incoming light in our lightmaps, computed by Lightmass, without the colors and textures of the materials. Notice that it’s quite a bit more complex than the lighting on our dynamic characters and weapons.
VFX
Visual effects are typically controlled by VFX artists, and they rarely incorporate our lighting and material responses. Engineers who work on shaders only contribute to systemic rendering issues here, like with smoke translucency.
Translucency Sorting
Translucency sorting is a particularly difficult problem to solve while still maintaining our goal minspec performance levels. For example, CS:GO’s smoke uses translucency, but other utilities like molotovs will accidentally show silhouettes of characters that shouldn’t be visible because they’re in smoke.
Smoke effects are often created as a camera-facing card - this means the effect looks different to each player depending on where they’re standing, but allows an artist to use a “smoke” texture and have it read like a 3D object in-world. This makes it possible for an enemy to see you without you being able to see them.
To resolve this, VALORANT’s vision-blocking elements like smoke have a harsh geometric gameplay edge that’s visible regardless of the viewing angle. This does cause our smoke to look quite geometric, but we avoid critical translucency sorting issues.
Scaling
We scale environments, characters, and weapons differently, so we can strike a balance between visual fidelity and performance on low quality settings.
We drop environment features most aggressively because they take up most of your screen, as mentioned above. For each object at low quality levels, we can keep either its diffuse response or its specular response - but not both. We measure shader computational complexity in instructions, or the amount of basic operations like add or multiply, that a shader needs to execute. We scale from 100 to 41 instructions on most objects from high to low quality.
Characters need to retain all gameplay-impacting features, so we drop specularity since characters don’t need to be shiny to read well. We scale from 128 to 84 instructions here.
Weapons are mostly shiny metals, so we typically drop diffuse responses. We scale from 103 to 73 instructions on base weapons.
 High
High
 Medium
 Low
Low
VFX
VFX is handled differently from in-game objects, because ability VFX are all so different from each other that there’s no way to scale everything consistently. Instead, we honor our pillar of gameplay integrity, and require all VFX to hit strict performance targets on our minspec hardware. The only variations between low, medium, and high quality levels are minor cosmetic effects.
For example, Omen’s smoke is ultimately a hard sphere that blocks vision. On higher quality levels, we add wispy effects, but these don’t affect the way you interact with the smoke.
Testing

Since performance is such a huge concern for us, we do significant compatibility testing across different machines with different specifications. Even with established modeling budgets and texture usage, we want to make sure we’re keeping the game as performant as we think we are.
Abilities
This testing has been particularly important for character abilities, with each ability being so unique. We work with a third-party development partner to run each ability on low and medium spec machines and note their framerate. Any issues are addressed by an engineer or artist on the team, and if the issue isn’t solvable, we work with designers to find alternate options.
Sova and Viper’s ultimates are examples of abilities that have had their designs changed to accomodate better performance.
Sova’s ult used to draw large translucent cylinders to show where he’s aiming before the full opaque lighting appears. This lowered framerate significantly on lower spec machines, so we ended up switching to a wireframe-like thin opaque outline of the shape instead.
Viper’s ult has a fullscreen post-process effect to limit an enemy’s sight. This was originally done as a very soft nearsighted effect, but instead we switched it to a defined range that decides where the vision block ends.
Conclusion
Thanks for reading! In my opinion, graphics are an incredibly interesting aspect of competitive games, because they’re not the main focus and our goal is to make things look beautiful without getting in the way of gameplay. Shaders really are a place where art and engineering meet, and with a background in primarily engineering, I’ve loved getting to dig into the art side as well.
I hope that some of the content in this article will make your next VALORANT game more exciting, and that you’ll be able to notice some of the ways we keep our game both competitive and performant. I’m not the only person working on graphics, nor is any of this a purely engineering effort - I’d particularly like to call out Chris Gillett and Sean Marino from the art team, who I worked closely with to accomplish much of what this article has spoken about.

My favorite piece of art from the development of VALORANT - a logo for Brandon’s Shader Club. I do shader work across the entire game, so it’s a running joke that teams have to sign up and renew their membership regularly.
If this has been interesting for you, or if you’d like to learn more, leave a comment below! I’ll be sure to read them all.